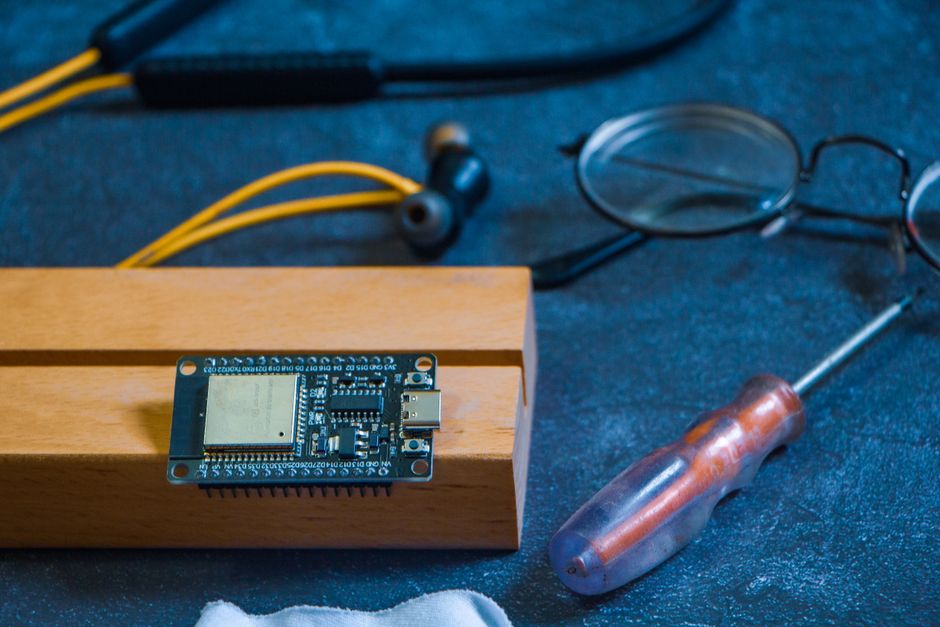
What Is the ESP32-S3 and Why Should You Use It for IoT in 2026?
Quick Answer: The ESP32-S3 is a dual-core microcontroller with built-in WiFi and Bluetooth, making it ideal for IoT projects. It offers 240 MHz processing power, 8 MB flash memory, and low power consumption. In 2026, it remains one of the most affordable and versatile platforms for building connected devices, sensors, and smart home automation. Its compatibility with Arduino IDE and MicroPython makes it accessible to beginners while powerful enough for advanced applications. Whether you’re building a weather station, home automation system, or wireless sensor network, the ESP32-S3 delivers professional-grade connectivity at a fraction of the cost of competing platforms.
The ESP32-S3 represents a significant upgrade from its predecessors. It features improved power efficiency, enhanced security capabilities, and better performance for real-time applications. The microcontroller integrates seamlessly with cloud platforms like AWS IoT, Google Cloud, and Azure. Its dual-core architecture allows simultaneous WiFi communication and sensor processing. Developers appreciate the extensive community support and thousands of available libraries. The device operates on 3.3V, making it compatible with standard IoT sensors and modules available in 2026.
What Are the Key Hardware Specifications of the ESP32-S3?
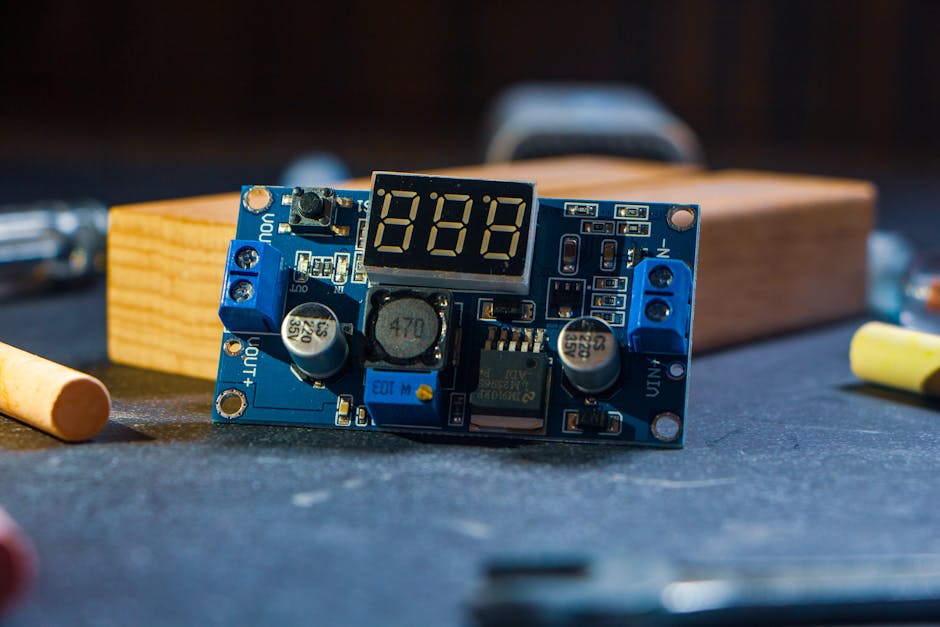
Understanding the ESP32-S3’s hardware specifications helps you design projects within its capabilities. The device features dual Tensilica Xtensa 32-bit processors running at 240 MHz. Memory options include 8 MB PSRAM and 16 MB flash storage on most development boards. The integrated WiFi supports 802.11 b/g/n standards at 2.4 GHz, while Bluetooth 5.0 enables low-energy wireless communication.
The ESP32-S3 includes multiple communication interfaces:
- SPI, I2C, and UART for wired sensor connections.
- USB-C for programming and power delivery.
- GPIO pins for digital input/output control.
- ADC channels for analog sensor readings.
- PWM outputs for motor and LED control.
Power Consumption and Battery Life
The ESP32-S3 is remarkably efficient for wireless applications. In active mode, it draws approximately 80-160 mA depending on WiFi usage. Deep sleep mode reduces consumption to just 10 μA, making battery-powered projects feasible. A 2000 mAh lithium battery can power a typical IoT sensor for weeks in intermittent WiFi mode. This efficiency is crucial for remote environmental monitoring and portable IoT devices.
Key Takeaway: The ESP32-S3 balances processing power with energy efficiency, making it suitable for both wired and battery-powered IoT applications.
How Do You Set Up the ESP32-S3 Development Environment in 2026?
Setting up your development environment is the first practical step. You’ll need the Arduino IDE or VS Code with PlatformIO extension. Download the latest ESP32 board package through the Arduino Board Manager. The process takes about 15 minutes for a complete setup. Most developers prefer Arduino IDE for its simplicity, though PlatformIO offers better project organization for larger applications.
Follow these setup steps:
- Install Arduino IDE 2.0 or later from the official Arduino website.
- Add the ESP32 board URL to preferences:
https://raw.githubusercontent.com/espressif/arduino-esp32/gh-pages/package_esp32_index.json - Install the ESP32 board package through Tools > Board Manager.
- Select “ESP32S3 Dev Module” from the boards list.
- Connect your ESP32-S3 via USB-C cable and select the correct COM port.
Installing Essential Libraries
Libraries extend the ESP32-S3’s functionality significantly. The WiFi library is pre-installed but you’ll need additional libraries for specific sensors and protocols. Search for libraries in the Arduino Library Manager by name. Popular libraries include PubSubClient for MQTT, DHT for temperature sensors, and Adafruit libraries for various modules. Install multiple versions carefully to avoid conflicts. Always check library documentation for compatibility with ESP32-S3 specifically.
Essential libraries for IoT projects include:
- WiFi.h (built-in) – for WiFi connectivity.
- PubSubClient – for MQTT messaging protocols.
- DHT – for DHT11/DHT22 temperature and humidity sensors.
- ArduinoJson – for JSON data parsing.
- Firebase Arduino Client – for cloud database integration.
Key Takeaway: Proper development environment setup ensures smooth coding and debugging throughout your IoT project lifecycle.
What Are the Best Programming Approaches for ESP32-S3 IoT Projects?
You have two primary programming options: Arduino C++ and MicroPython. Arduino C++ offers better performance and more libraries, making it ideal for complex projects. MicroPython provides easier syntax and faster prototyping for beginners. Most professionals use Arduino C++ for production IoT devices, while educators prefer MicroPython for teaching. Choose based on your experience level and project complexity. Both languages compile to efficient machine code on the ESP32-S3.
Arduino C++ Programming Basics
Arduino C++ is the standard approach for ESP32-S3 development. The basic structure includes setup() and loop() functions. Setup() runs once at startup for initialization, while loop() executes repeatedly. Here’s a simple WiFi connection example:
#include <WiFi.h>

const char* ssid = "your_wifi_ssid";
const char* password = "your_wifi_password";

void setup() {
  Serial.begin(115200);
  WiFi.begin(ssid, password);
  while (WiFi.status() != WL_CONNECTED) {
    delay(500);
    Serial.print(".");
  }
  Serial.println("WiFi connected!");
}

void loop() {
  if (WiFi.isConnected()) {
    Serial.println("Connected");
  }
  delay(5000);
}
This code connects to WiFi and prints connection status every 5 seconds. The WiFi library handles all connection complexity. Serial communication at 115200 baud enables debugging through the USB port. Always verify your WiFi credentials match exactly, including capitalization.
MicroPython for Rapid Prototyping
MicroPython enables faster development cycles with simpler syntax. Install MicroPython firmware using esptool, then code directly in Thonny or VS Code. The learning curve is gentler for beginners without C++ experience. Performance is adequate for most sensor-based IoT applications. MicroPython is excellent for educational projects and rapid prototyping before final production optimization.
Key Takeaway: Arduino C++ suits production IoT devices while MicroPython accelerates learning and prototyping.
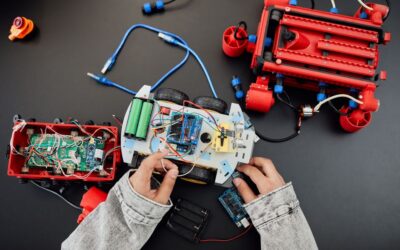
How Do You Connect Sensors and Modules to Your ESP32-S3?
Sensor integration transforms the ESP32-S3 into a functional IoT device. Most sensors connect via I2C, SPI, or analog GPIO pins. I2C is the simplest protocol for multiple sensors, requiring only two wires. SPI offers faster data transfer for demanding applications. Analog sensors connect directly to ADC pins for voltage measurements. Always reference your sensor’s datasheet for correct pin connections and voltage requirements.
Common sensor connection types include:
- I2C sensors (BME280, BMP280, OLED displays) – use GPIO 21 (SDA) and GPIO 22 (SCL).
- SPI sensors (SD cards, some displays) – use GPIO 10 (CS), 11 (MOSI), 12 (MISO), 13 (CLK).
- Digital GPIO (motion sensors, buttons) – any available GPIO pin.
- Analog sensors (light, moisture) – use GPIO 1-10 ADC pins.
- UART sensors (GPS modules) – use GPIO 43 (RX) and GPIO 44 (TX).
Building a Temperature and Humidity Sensor Project
A DHT22 temperature and humidity sensor is an excellent beginner project. The sensor connects via a single data line to GPIO 4. Install the DHT library through the Arduino Library Manager. The code reads temperature and humidity every 2 seconds and prints values to the serial monitor. This project teaches sensor reading, data formatting, and basic IoT concepts.
Here’s the complete DHT22 implementation:
#include "DHT.h"

#define DHTPIN 4
#define DHTTYPE DHT22

DHT(DHTPIN, DHTTYPE);

void setup() {
  Serial.begin(115200);
  dht.begin();
}

void loop() {
  float humidity = dht.readHumidity();
  float temperature = dht.readTemperature();

  if (isnan(humidity) || isnan(temperature)) {
    Serial.println("Failed to read from DHT");
  } else {
    Serial.print("Temperature: ");
    Serial.print(temperature);
    Serial.print("°C, Humidity: ");
    Serial.print(humidity);
    Serial.println("%");
  }
  delay(2000);
}
This code initializes the DHT22 sensor and reads values in the main loop. Error checking prevents crashes from sensor failures. Serial output displays formatted temperature and humidity readings. Expand this project by adding WiFi to send data to cloud platforms.
Key Takeaway: Sensor integration requires understanding communication protocols and proper GPIO pin configuration.
What Are Practical IoT Project Ideas Using ESP32-S3?
The ESP32-S3 enables countless IoT applications. Home automation projects include smart lighting, temperature control, and security monitoring. Environmental monitoring systems track air quality, soil moisture, and weather conditions. Industrial applications include equipment monitoring and predictive maintenance. Personal projects range from pet trackers to plant watering systems. Start with simple projects before advancing to complex multi-sensor systems.
Popular IoT project categories include:
- Smart home devices – WiFi-controlled lights, locks, and thermostats.
- Environmental sensors – weather stations and air quality monitors.
- Health tracking – heart rate monitors and activity trackers.
- Agricultural IoT – soil moisture, temperature, and automated irrigation.
- Industrial monitoring – machine sensors and predictive maintenance systems.
Building a WiFi-Enabled Weather Station
A weather station combines temperature, humidity, pressure, and WiFi connectivity. Use a BME280 sensor for all three environmental measurements via I2C. Connect to WiFi and send data to a cloud service like ThingSpeak. The project teaches sensor integration, WiFi communication, and cloud data logging. Display readings on an OLED screen for local monitoring while uploading to the cloud simultaneously.
This project demonstrates essential IoT concepts: sensor reading, WiFi communication, and cloud integration. Expand it by adding UV sensors, rainfall detection, or wind speed measurement. The modular design allows easy sensor additions. Battery operation enables deployment in remote locations. Real-time data visualization on ThingSpeak or similar platforms provides valuable insights.
Key Takeaway: Practical IoT projects combine hardware integration, wireless communication, and cloud connectivity to solve real-world problems.
How Do You Connect ESP32-S3 to Cloud Platforms and MQTT?
Cloud connectivity transforms local sensor data into accessible, analyzable information. MQTT is the standard lightweight protocol for IoT devices. WiFi enables direct connection to cloud services like AWS IoT, Google Cloud, and Azure. Most projects use either MQTT brokers or REST APIs for data transmission. MQTT is more efficient for frequent updates, while REST APIs suit periodic data submissions.
MQTT Protocol Implementation
MQTT uses a publish-subscribe model where devices send data to topics. Install the PubSubClient library for MQTT support. Configure your WiFi connection first, then establish MQTT connection. Publish sensor readings to topics like “home/bedroom/temperature”. Subscribe to control topics for receiving commands from cloud applications. This bidirectional communication enables both monitoring and remote control.
Here’s a basic MQTT implementation:
#include <WiFi.h>
#include <PubSubClient.h>

const char* mqtt_server = "broker.hivemq.com";
const char* ssid = "your_ssid";
const char* password = "your_password";

WiFiClient espClient;
PubSubClient client(espClient);

void setup() {
  Serial.begin(115200);
  WiFi.begin(ssid, password);
  client.setServer(mqtt_server, 1883);
}

void loop() {
  if (!client.connected()) {
    reconnect();
  }
  client.loop();

  // Publish temperature every 10 seconds
  static unsigned long lastPublish = 0;
  if (millis() - lastPublish > 10000) {
    client.publish("home/temperature", "22.5");
    lastPublish = millis();
  }
}

void reconnect() {
  while (!client.connected()) {
    if (client.connect("ESP32S3Client")) {
      client.subscribe("home/control");
    } else {
      delay(5000);
    }
  }
}
This code connects to HiveMQ, a free MQTT broker. Publishes temperature data every 10 seconds. Subscribes to control topics for receiving remote commands. The reconnect function handles connection failures automatically. Use this pattern for production IoT systems requiring reliable cloud communication.
REST API Integration
REST APIs offer simpler integration for cloud services. Use the HTTPClient library to send POST requests with sensor data. JSON formatting makes data parsing straightforward on cloud servers. This approach suits applications with less frequent data transmission. REST APIs work with popular services like Google Sheets, IFTTT, and custom web servers. Choose MQTT for real-time applications and REST for periodic reporting.
Key Takeaway: MQTT enables efficient real-time IoT communication while REST APIs provide simpler integration with web services.
What Troubleshooting and Optimization Tips Improve ESP32-S3 Performance?
Common issues include WiFi disconnections, memory constraints, and power consumption problems. WiFi stability improves with proper antenna placement and signal strength monitoring. Memory management becomes critical in complex projects with multiple sensors. Power optimization extends battery life significantly through sleep modes and duty cycling. Serial debugging reveals most software issues quickly. Always monitor free memory during development to prevent crashes.
Essential troubleshooting techniques include:
- Enable serial debugging to monitor WiFi status and memory usage.
- Use
Serial.println(ESP.getFreeHeap())to check available memory. - Implement WiFi reconnection logic for unstable networks.
- Enable deep sleep mode between sensor readings to save power.
- Monitor heap fragmentation and optimize string handling.
Power Optimization Strategies
Battery-powered projects require aggressive power management. Deep sleep mode reduces consumption to microamps between readings. Set WiFi to power-saving mode when not actively transmitting. Use timers instead of constant polling for sensor readings. Reduce serial output in production code as printing consumes significant power. A well-optimized weather station can run for months on a single battery.
Implement this deep sleep pattern for battery projects:
void deepSleep() {
  // Read sensor
  float temperature = readTemperature();

  // Publish via WiFi
  publishToCloud(temperature);

  // Sleep for 15 minutes (900 seconds)
  esp_sleep_enable_timer_wakeup(900 * 1000000);
  esp_deep_sleep_start();
}
This pattern reads sensors, transmits data, then sleeps for 15 minutes. The device wakes automatically for the next reading cycle. Power consumption drops to nearly zero during sleep. This approach extends battery life from days to months depending on battery capacity and sleep duration.
Key Takeaway: Proper debugging, memory management, and power optimization are essential for reliable production IoT deployments.
How Can You Secure Your ESP32-S3 IoT Devices in 2026?
Security is critical for IoT devices handling sensitive data or controlling physical systems. Use strong WiFi encryption (WPA3 if available). Implement MQTT authentication with username and password. Store sensitive credentials in EEPROM or flash memory, never hardcode them. Update firmware regularly to patch vulnerabilities. Validate all incoming data from cloud services before executing commands. Network segmentation isolates IoT devices from critical systems.
Security best practices for ESP32-S3 projects:
- Enable WPA2/WPA3 WiFi encryption with strong passwords.
- Use MQTT brokers requiring authentication credentials.
- Store API keys in protected memory, not source code.
- Validate all cloud-received commands before execution.
- Update firmware monthly to address security patches.
- Use HTTPS when available instead of plain HTTP.
Key Takeaway: Implementing security from the project’s beginning prevents data breaches and unauthorized device control.
What Are the Best Learning Resources for ESP32-S3 Development?
Extensive community resources support ESP32-S3 learning. The official Espressif documentation provides comprehensive technical references. GitHub hosts thousands of example projects demonstrating various applications. Arduino Project Hub features curated tutorials from beginner to advanced levels. YouTube channels dedicated to IoT development offer video walkthroughs. Online courses from platforms like Udemy and Coursera provide structured learning paths.
Related STEM learning resources complement ESP32-S3 education. The Smart Student’s Guide to Smart Manufacturing in 2026 covers industrial IoT applications. The SunFounder PiCar-X Raspberry Pi 5 Setup guide demonstrates robotics integration with similar wireless concepts. These resources help contextualize ESP32-S3 within broader STEM education frameworks.
Key Takeaway: Diverse learning resources from official documentation to community projects accelerate ESP32-S3 mastery.
What Is the Complete Workflow for Deploying an ESP32-S3 IoT Project?
Successful IoT deployment follows a structured workflow from conception to production. Start with requirements definition and sensor selection. Design the hardware architecture including power supply and connectivity. Develop and test software thoroughly in controlled environments. Implement cloud integration and data logging. Deploy in the target environment with monitoring. Maintain and update the system based on performance data. This systematic approach prevents costly mistakes and ensures reliability.
The complete deployment workflow includes:
- Requirements analysis – define project goals and success metrics.
- Hardware design – select sensors, microcontroller, and power supplies.
- Software development – code sensors, WiFi, and cloud integration.
- Testing – validate functionality in controlled environments.
- Deployment – install in production with monitoring enabled.
- Maintenance – monitor performance and update firmware regularly.
Key Takeaway: Following a structured deployment workflow ensures ESP32-S3 IoT projects achieve reliability and maintainability.
Conclusion: Why ESP32-S3 Remains the Top Choice for IoT Projects in 2026
The ESP32-S3 dominates IoT development in 2026 due to its exceptional balance of performance, affordability, and ease of use. Its dual-core architecture, integrated WiFi and Bluetooth, and extensive community support make it ideal for projects ranging from simple sensors to complex automation systems. The microcontroller’s power efficiency enables battery-powered deployments that last months on a single charge. Whether you’re a beginner learning IoT fundamentals or an experienced developer building production systems, the ESP32-S3 provides the tools and flexibility needed for success.
The journey from unboxing your first ESP32-S3 to deploying a cloud-connected IoT system is achievable in weeks with focused effort. Start with simple projects like temperature sensors, then progressively add complexity through WiFi connectivity, MQTT communication, and cloud integration. The extensive library ecosystem and active community ensure solutions exist for virtually any challenge. By mastering the ESP32-S3 in 2026, you’re investing in skills applicable across countless IoT applications for years to come. Your next innovative IoT project awaits—the ESP32-S3 provides everything needed to bring it to life.


Write Your Review
No reviews yet. Be the first to share your experience!