What Is the SunFounder PiCar-X and Why Choose Raspberry Pi 5 in 2026?
The SunFounder PiCar-X is a smart robot car platform that combines hardware assembly with Python programming education. It features a four-wheel drive chassis, ultrasonic sensors, camera module, and servo-based steering. Pairing it with Raspberry Pi 5 provides significant performance upgrades over earlier models. The Pi 5 delivers faster processing speeds, improved thermal management, and better support for real-time robotics tasks. This combination makes it ideal for students and hobbyists learning robotics in June 2026 and beyond. The platform teaches practical skills in electronics, programming, and autonomous navigation simultaneously.
Setting up the PiCar-X with Raspberry Pi 5 requires careful attention to hardware assembly, software installation, and sensor calibration. The process typically takes 2–4 hours for first-time builders. Understanding each step prevents common mistakes like loose connections or incorrect GPIO pin assignments. This guide walks you through every stage, from unboxing to running your first autonomous program. By the end, you’ll have a fully functional robot car ready for exploration and experimentation.
Key Takeaway: The SunFounder PiCar-X with Raspberry Pi 5 is a powerful platform for learning robotics, combining hardware assembly with practical Python programming skills.
How Do You Assemble the SunFounder PiCar-X Hardware?
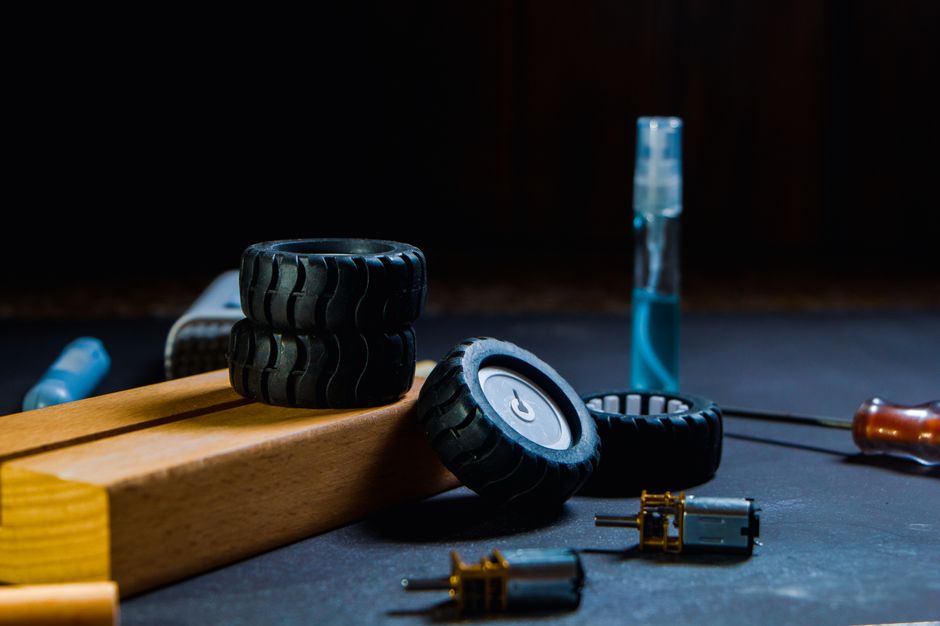
Hardware assembly is the foundation of your PiCar-X project. Start by organizing all components and checking them against the parts list in the official documentation. The assembly process follows a logical sequence: chassis preparation, motor installation, sensor mounting, and final integration. Each step requires precision to ensure proper functionality and alignment. Rushing through assembly often leads to misalignment issues that affect steering and navigation accuracy later.
The chassis serves as the structural backbone of your robot car. Begin by attaching the four DC motors to the motor mounts using the provided brackets and screws. Ensure motors are firmly secured and aligned parallel to the chassis frame. Next, install the wheels onto the motor shafts, making sure they spin freely without wobbling. The wheel alignment directly impacts steering performance, so take time to verify this step carefully.
Installing the Servo Motor and Steering Mechanism
The servo motor controls the front wheels’ steering direction through a linkage system. Mount the servo to the designated bracket on the chassis, ensuring it’s centered and level. Attach the steering linkage rods to both front wheels and the servo horn. The servo must be calibrated to the center position before programming begins. Incorrect servo installation causes the car to pull left or right uncontrollably during autonomous navigation.
- Secure the servo motor to the front bracket using provided screws.
- Attach linkage rods to the servo horn and wheel mounting points.
- Verify the steering mechanism moves smoothly through its full range.
- Test that wheels turn equally left and right when servo moves.
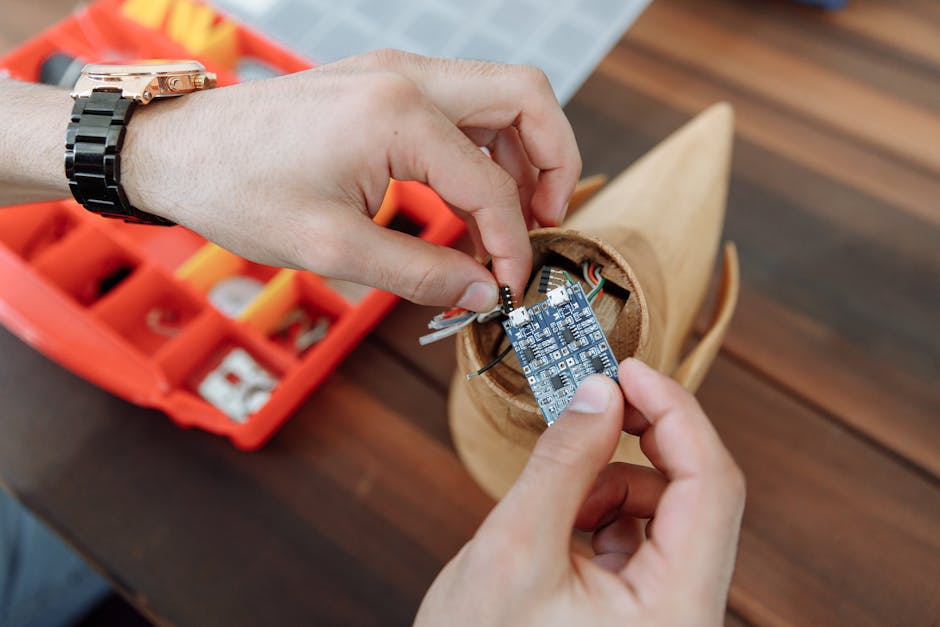
Mounting Sensors and the Camera Module
Sensor placement determines how well your PiCar-X perceives its environment. The ultrasonic sensor mounts on the front bumper to detect obstacles. Position it at approximately 5 centimeters above ground level for optimal range detection. The camera module attaches to the top-front area, angled slightly downward for lane detection and object recognition tasks. Both components must be securely fastened to prevent vibration-induced drift during movement.
- Mount the ultrasonic sensor on the front bumper bracket.
- Attach the Raspberry Pi camera to the designated camera mount.
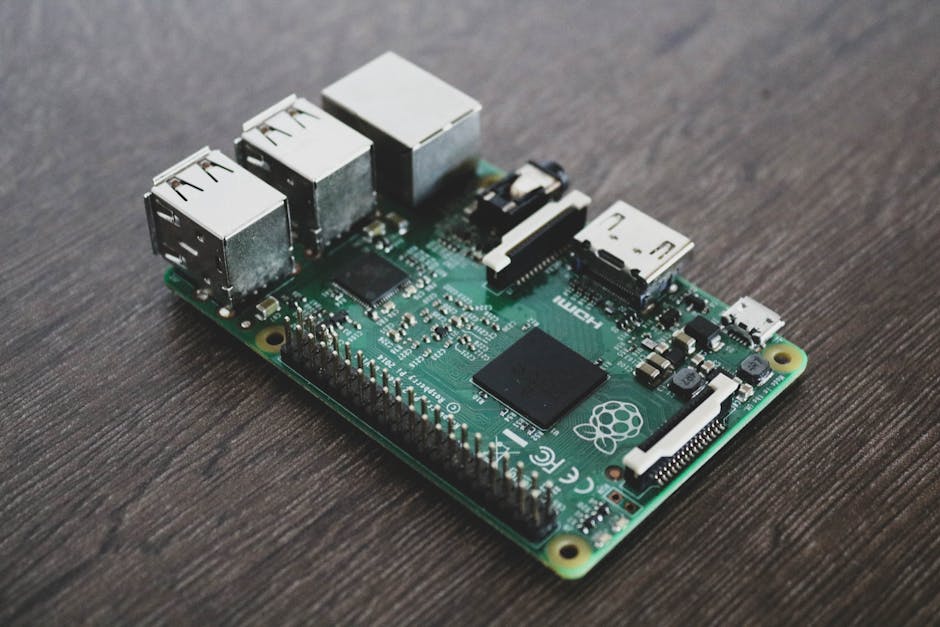
- Secure the Raspberry Pi 5 to the chassis using rubber standoffs.
- Connect the power distribution board to battery terminals.
Key Takeaway: Careful hardware assembly with proper sensor alignment ensures accurate robot car performance and reliable autonomous navigation capabilities.
What Software Installation Steps Are Required for Raspberry Pi 5?
Software setup transforms your assembled hardware into a functional robot car. Begin by installing Raspberry Pi OS on a microSD card using the official Raspberry Pi Imager tool. Download the latest version compatible with Raspberry Pi 5 from the Raspberry Pi Foundation website. Write the OS image to your microSD card, then insert it into the Pi 5. Connect the Pi to a monitor, keyboard, and mouse for initial configuration. This step establishes the operating system foundation for all subsequent software installations.
After booting Raspberry Pi OS, update the system packages to ensure compatibility with PiCar-X libraries. Open a terminal and run system update commands to fetch the latest security patches and dependencies. Configure the camera interface through the Raspberry Pi Configuration tool. Enable I2C and SPI protocols required for sensor communication. These preliminary steps prevent hardware detection issues and compatibility problems later in the setup process.
Installing the PiCar-X Software Libraries
SunFounder provides official Python libraries and example code for the PiCar-X platform. Clone the repository from SunFounder’s GitHub account to your Raspberry Pi. Navigate to the installation directory and run the setup script to install all dependencies automatically. This includes libraries for motor control, servo calibration, sensor reading, and camera integration. The installation process takes 5–10 minutes depending on your internet connection speed.
git clone https://github.com/sunfounder/picar-x.git
cd picar-x
sudo python3 setup.py install
After installation completes, verify that all modules load correctly by importing them in Python. Test basic functionality like motor movement and sensor readings using provided example scripts. These verification steps confirm that your software environment is properly configured before attempting autonomous driving programs.
Configuring GPIO Pins and Sensor Calibration
GPIO pin assignment is critical for proper hardware communication with Raspberry Pi 5. The PiCar-X uses specific pins for motors, servo, ultrasonic sensor, and camera. Review the official pinout documentation to understand which pins control which components. Incorrect pin assignments cause devices to malfunction or fail to respond to commands. The configuration file typically resides in the library directory and can be edited with any text editor.
- Map GPIO pins according to the official PiCar-X documentation.
- Calibrate the servo to the center position using calibration scripts.
- Test motor speed and direction with individual motor control examples.
- Verify ultrasonic sensor range detection in an open space.
- Check camera feed clarity and adjust focus if necessary.
Key Takeaway: Proper software installation and GPIO configuration enable reliable communication between Raspberry Pi 5 and all PiCar-X hardware components.
How Do You Test and Calibrate the PiCar-X System?
Testing each component individually prevents cascading failures during autonomous operation. Start by testing motor functionality with simple forward and backward commands. Verify that all four motors respond correctly to speed and direction inputs. Check that the servo steering mechanism moves smoothly and centers properly. Test the ultrasonic sensor by measuring distances to objects at various positions. These individual tests confirm that each component functions before integrating them into complex programs.
Calibration fine-tunes system behavior for optimal performance. Motor speed calibration ensures all four wheels move at the same velocity, preventing drift. Servo center calibration establishes the neutral steering position. Camera calibration adjusts focus and white balance for reliable vision-based tasks. Distance calibration for the ultrasonic sensor accounts for environmental factors like temperature and humidity. Proper calibration is essential for autonomous navigation accuracy.
Running Test Scripts and Diagnostics
SunFounder provides diagnostic scripts that test all components systematically. These scripts identify hardware issues, GPIO conflicts, and software configuration problems. Run the complete diagnostic suite to generate a report of your system’s health. Any failures in these tests must be addressed before proceeding to autonomous programs. The diagnostic output helps troubleshoot specific components causing problems.
- Execute motor test scripts to verify all wheels respond correctly.
- Run servo calibration to establish the center steering position.
- Test ultrasonic sensor range detection at multiple distances.
- Verify camera feed quality and resolution settings.
- Check battery voltage and power distribution system health.
Performing First Movement Tests
Begin with simple movement patterns in an open, obstacle-free space. Program the car to move forward for a set distance, then stop. Observe whether the car moves straight or drifts left or right. Adjust motor speed values if drift occurs. Test backward movement, left turns, and right turns separately. Document any adjustments needed for future reference. These basic tests establish baseline behavior before attempting complex autonomous navigation.
Key Takeaway: Systematic testing and calibration of individual components ensures reliable autonomous operation and accurate sensor readings.
What Practical Tips Help You Program Autonomous Behavior?
Programming autonomous behavior transforms your PiCar-X from a remote-controlled car into an intelligent robot. Start with simple programs that demonstrate fundamental concepts like obstacle avoidance and line following. These foundational programs teach sensor integration and decision-making logic. Gradually increase complexity by combining multiple sensors and behaviors. Document your code with clear comments explaining the logic. Well-structured code is easier to debug and modify later.
Consider exploring related platforms like the M5Stack CardPuter MicroPython Tutorial 2026 for additional programming concepts applicable to robotics projects. Understanding different microcontroller approaches broadens your robotics knowledge and problem-solving skills.
Step-by-Step Programming Approach
- Start with basic motor control: forward, backward, turn left, turn right.
- Implement obstacle detection using ultrasonic sensor readings.
- Create decision logic: if obstacle detected, stop and turn.
- Add line-following capability using camera-based lane detection.
- Combine multiple behaviors into more complex autonomous programs.
- Test each program in a controlled environment before scaling complexity.
Common Programming Patterns for Robot Cars
Obstacle avoidance is the most fundamental autonomous behavior. The robot continuously reads the ultrasonic sensor and stops when objects approach within a safe distance. Once stopped, it selects an alternative direction and resumes movement. This pattern prevents collisions and enables exploration in unknown spaces. Line following uses camera input to detect lane markings or colored lines on the ground. The robot adjusts steering to maintain alignment with the detected line. These two patterns form the foundation for more advanced autonomous behaviors.
Waypoint navigation allows you to program specific coordinates for the robot to visit sequentially. This requires integrating compass data or visual landmarks for position estimation. Object tracking enables the robot to follow moving targets using camera input. Maze solving combines obstacle avoidance with memory to navigate complex environments. Each behavior requires different sensor inputs and decision-making logic.
Key Takeaway: Building autonomous behavior incrementally from simple to complex patterns creates reliable and maintainable robot programs.
How Do You Troubleshoot Common SunFounder PiCar-X Issues?
Even with careful setup, issues occasionally arise during PiCar-X operation. Common problems include motors not responding, uneven wheel speeds, servo jitter, and sensor reading errors. Systematic troubleshooting isolates the root cause and guides you toward the solution. Start by checking physical connections: loose wires cause most hardware-related failures. Verify that all connectors are firmly seated and no pins are bent. Inspect the battery voltage to ensure sufficient power for all components.
Software issues often stem from incorrect GPIO pin assignments or missing library dependencies. Review your configuration files against the official documentation. Reinstall libraries if import errors occur. Check that Raspberry Pi OS is fully updated with the latest patches. Enable debug mode in your programs to capture detailed error messages. These diagnostic steps pinpoint software configuration problems.
Addressing Motor and Movement Problems
- Motors not responding: Check GPIO pin assignments and battery voltage.
- Uneven wheel speeds: Recalibrate motor speed values for each wheel.
- Car drifts left or right: Adjust motor speeds to compensate for imbalance.
- Wheels spin but car doesn’t move: Verify wheel attachment and motor shaft alignment.
Fixing Sensor and Camera Issues
Ultrasonic sensor errors often result from loose wiring or incorrect GPIO pins. Verify connections and test the sensor with diagnostic scripts. Camera issues typically involve focus problems or incorrect configuration settings. Clean the camera lens and adjust focus using provided tools. Check that the camera is enabled in Raspberry Pi Configuration. If the camera still doesn’t work, try a different camera cable or camera module to isolate hardware failures.
Key Takeaway: Systematic troubleshooting that checks physical connections, power supply, and software configuration resolves most PiCar-X issues quickly.
Frequently Asked Questions
What is the total cost of a complete SunFounder PiCar-X Raspberry Pi 5 setup in 2026?
A complete setup costs approximately $200–$300 USD in June 2026. This includes the PiCar-X kit ($80–$120), Raspberry Pi 5 ($60–$80), microSD card ($15–$25), power supply ($20–$30), and optional accessories like additional sensors or batteries ($20–$50). Prices vary by retailer and region. Educational bundles sometimes offer discounts for bulk purchases. Check SunFounder’s official website and authorized retailers for current pricing and promotions.
How long does it typically take to complete the PiCar-X setup from start to finish?
First-time setup usually takes 3–5 hours total. Hardware assembly requires 1–2 hours depending on your experience level. Software installation and configuration takes 1–1.5 hours. Testing and calibration require 1–1.5 hours. Experienced builders can complete the process in 2–3 hours. Taking your time ensures proper assembly and configuration, preventing problems later. Rushing through setup often leads to frustrating troubleshooting sessions afterward.
Can you use the PiCar-X with earlier Raspberry Pi models instead of Raspberry Pi 5?
Yes, the PiCar-X is compatible with Raspberry Pi 4, Pi 4B, and Pi Zero models. However, Raspberry Pi 5 offers superior performance for real-time autonomous tasks. Earlier models may struggle with simultaneous camera processing and sensor reading. Pi 5’s improved CPU and thermal management make it ideal for complex robotics programs. If using older Pi models, simplify your programs or reduce update frequency to maintain stable operation.
What programming language does the SunFounder PiCar-X use?
The PiCar-X primarily uses Python 3 for programming. SunFounder provides comprehensive Python libraries and example code. Python’s simplicity makes it ideal for learning robotics concepts. The platform also supports C++ and other languages, but Python is the recommended and best-documented option. If you’re new to programming, learning Python with the PiCar-X is an excellent starting point.
Are there online communities or forums for PiCar-X users?
Yes, active communities exist on Reddit, GitHub, and SunFounder’s official forum. The SunFounder GitHub repository hosts code, documentation, and issue discussions. Reddit’s r/robotics and r/raspberry_pi communities include PiCar-X discussions. These forums provide peer support, code examples, and troubleshooting help. Engaging with the community accelerates your learning and connects you with experienced builders.
What safety precautions should you take when operating the PiCar-X?
Always operate the PiCar-X in open spaces away from people and pets during testing. Disable autonomous mode when adjusting hardware or debugging code. Ensure the battery is properly connected before powering on the system. Avoid running the robot on sloped surfaces where it might roll away. Use a kill switch or emergency stop mechanism for safety. Test new programs in controlled environments before allowing autonomous operation in shared spaces.
How Can You Expand Your PiCar-X Skills Beyond Basic Setup?
After mastering basic PiCar-X operation, explore advanced topics like computer vision, machine learning, and multi-sensor fusion. Implement object recognition using TensorFlow Lite on Raspberry Pi 5. Build custom sensors or integrate third-party modules for expanded capabilities. Connect your PiCar-X to cloud services for remote monitoring and data logging. These advanced projects deepen your robotics and programming knowledge significantly.
Consider combining your PiCar-X experience with other educational platforms. The How to Program M5Stack CardPuter in 2026: Complete Guide teaches microcontroller programming concepts applicable to robotics. Exploring multiple platforms broadens your technical skills and provides different perspectives on embedded systems design. Cross-platform knowledge makes you a more versatile roboticist and engineer.
Document your projects through blog posts, GitHub repositories, or video tutorials. Sharing your work helps others learn and builds your portfolio. Contributing to open-source robotics projects advances the entire community. Participate in robotics competitions or maker fairs to showcase your PiCar-X creations. These activities transform your hobby into meaningful engagement with the robotics community.
Key Takeaway: Continuous learning and community engagement transform your PiCar-X from a beginner project into a foundation for advanced robotics expertise.
What Should You Remember About SunFounder PiCar-X Setup in June 2026?
The SunFounder PiCar-X with Raspberry Pi 5 represents an excellent entry point into practical robotics education. Careful hardware assembly, methodical software installation, and systematic testing ensure success. Raspberry Pi 5’s performance advantages over earlier models justify the investment for serious robotics learners. The combination provides ample processing power for real-time autonomous navigation and computer vision tasks. Whether you’re a student exploring STEM fields or a hobbyist building robots, this platform delivers educational value and practical learning opportunities.
Remember that robotics is iterative: your first autonomous program won’t be perfect, and hardware may need adjustments. Embrace troubleshooting as a learning opportunity rather than a setback. Document your process, share your experiences with the community, and continuously refine your skills. The PiCar-X teaches not just robotics, but problem-solving, persistence, and creative engineering thinking. These skills extend far beyond this single project and benefit your career and personal development long-term.
Key Takeaway: The SunFounder PiCar-X with Raspberry Pi 5 provides a complete, practical robotics learning platform combining hardware assembly, software programming, and autonomous system design.


Write Your Review
No reviews yet. Be the first to share your experience!