What Can Teens Build With the Elecfreaks Micro:bit Starter Kit in 2026?
The Elecfreaks micro:bit starter kit empowers teens to create interactive electronics projects combining coding, hardware, and creativity. This kit includes the BBC micro:bit microcontroller, sensors, motors, LEDs, and building blocks for constructing everything from traffic lights to autonomous robots. Teens gain practical skills in Python and block-based programming while exploring real-world applications of technology. The kit’s modular design encourages experimentation and problem-solving. With over 50 documented projects available, students can progress from beginner circuits to advanced robotics. The Elecfreaks ecosystem integrates seamlessly with other STEM platforms, making it ideal for classroom learning and independent exploration. By June 2026, the kit remains one of the most accessible entry points into electronics and embedded systems for young learners.
Elecfreaks micro:bit projects teach computational thinking through hands-on building. Teens develop confidence tackling complex challenges step-by-step. The kit’s affordability makes it accessible to schools and home learners alike.
How Do You Set Up Your Elecfreaks Micro:bit Starter Kit?
Setting up your Elecfreaks micro:bit starter kit takes 15–20 minutes. First, unbox all components and verify against the included inventory checklist. Connect the micro:bit to your computer via USB cable. Visit the official micro:bit website and download the MakeCode editor or use the browser-based version. Create a free account to save your projects. Install any required drivers for your operating system. Test the connection by uploading a simple “Hello World” program to confirm everything works. Familiarize yourself with the physical components: the breadboard, jumper wires, resistors, LEDs, and sensors included in your specific kit version.
The setup process requires no soldering or advanced tools.
Essential Components in the Kit
- BBC micro:bit microcontroller with built-in LED matrix and buttons.
- Breadboard for prototyping circuits without soldering.
- Jumper wires in multiple colors for easy circuit connections.
- Resistors and capacitors for circuit protection and function.
- Various sensors: temperature, light, motion, and ultrasonic.
- Motors and servo components for movement projects.
- USB cable and battery pack for power options.
Software Installation Steps
- Visit microbit.org and select your preferred editor (MakeCode or Python).
- Create a user account to save and organize projects.
- Download and install any operating system-specific drivers.
- Connect micro:bit via USB and test with a simple LED blink program.
- Verify the program uploads successfully to the device.
Key Takeaway: Proper setup ensures smooth project development and prevents frustrating connection issues later.
What Are the Top 10 Beginner Projects for Teens Using Elecfreaks Micro:bit?
Beginner projects build foundational skills in circuit design and basic programming. These projects typically require 30 minutes to two hours and use core components from the starter kit. They introduce concepts like variables, loops, conditionals, and sensor input. Completing beginner projects builds confidence before tackling advanced robotics or complex systems. Each project reinforces one or two core programming concepts. Teens should complete these sequentially to develop logical thinking progressively. Documentation and tutorials are widely available for all listed projects.
Foundational Beginner Builds
- LED Blink: Flash an LED on and off using timed loops.
- Traffic Light System: Control red, yellow, and green LEDs with conditional logic.
- Temperature Display: Read the built-in temperature sensor and show values on the LED matrix.
- Light-Sensitive LED: Adjust LED brightness based on ambient light levels.
- Button Counter: Count button presses and display the total.
- Sound Detector: Trigger actions when the microphone detects loud noises.
- Simple Buzzer Alarm: Create sound alerts using the buzzer module.
- Compass Display: Show directional data from the built-in compass sensor.
- Step Counter: Use the accelerometer to detect movement and count steps.
- Message Scroller: Display scrolling text on the 5×5 LED matrix.
Each project teaches debugging skills and introduces the MakeCode interface systematically. Teens learn to read error messages and troubleshoot connection problems independently.
Key Takeaway: Beginner projects establish programming fundamentals that enable success with advanced robotics and sensor integration.
Which Intermediate Projects Challenge Teens to Combine Multiple Sensors and Logic?
Intermediate projects integrate multiple sensors, decision-making logic, and real-world problem-solving. These projects take two to four hours and require planning before building. Teens learn to design circuits, write more complex code, and debug multisystem interactions. Intermediate builds teach planning, documentation, and iterative design. These projects often have practical applications teens can relate to: home automation, environmental monitoring, or interactive games. Success requires understanding how sensors communicate with the micro:bit and how to process sensor data meaningfully. Projects at this level prepare teens for advanced robotics and IoT applications.
Intermediate Integration Projects
- Obstacle-Avoiding Robot: Combine ultrasonic sensor with motor control for autonomous navigation.
- Weather Station: Integrate temperature, humidity, and pressure sensors for data logging.
- Intruder Alarm System: Use motion sensors and buzzers to create a security system.
- Automatic Plant Watering: Monitor soil moisture and trigger a water pump automatically.
- Smart Home Light Controller: Combine light sensors with relay switches for automated lighting.
- Gesture-Controlled Robot: Use accelerometer input to control motor movements via hand tilting.
Intermediate projects require problem-solving when sensors behave unexpectedly. Teens learn to test individual components before integrating them. This systematic approach builds professional engineering habits.
Key Takeaway: Intermediate projects teach systems thinking by requiring teens to manage multiple components working together.
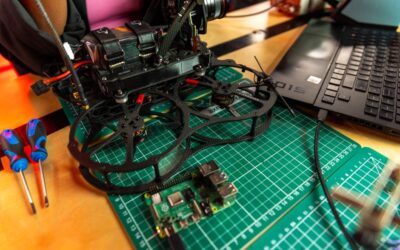
What Advanced Robotics Projects Can Teens Build With Elecfreaks Micro:bit?
Advanced projects transform the micro:bit into the brain of autonomous robots and complex systems. These builds take 8–20 hours across multiple sessions and require careful planning. Teens design mechanical structures, write sophisticated algorithms, and troubleshoot real-world engineering challenges. Advanced projects often combine the micro:bit with external platforms like Raspberry Pi for enhanced computing power. Projects at this level prepare teens for robotics competitions, maker fairs, and advanced STEM coursework. Success requires persistence, documentation, and collaborative problem-solving. Many teens create portfolio pieces suitable for college applications or internship opportunities.
Advanced Robotics Builds
- Line-Following Robot: Use infrared sensors to detect and follow black lines autonomously.
- Robotic Arm with Servo Control: Build a 3-4 joint arm with precise positional control.
- Maze-Solving Robot: Implement algorithms to navigate complex mazes automatically.
- Wireless Communication System: Connect multiple micro:bits for data transmission and control.
- Computer Vision Project: Integrate with camera modules for object detection and tracking.
- Multi-Sensor Environmental Monitor: Create IoT systems logging data to cloud platforms.
Advanced projects often require purchasing additional components beyond the starter kit. Teens learn to source parts, evaluate specifications, and integrate third-party hardware. This real-world engineering skill transfers directly to professional environments.
Key Takeaway: Advanced projects develop professional engineering practices and create impressive portfolio pieces for academic advancement.
How Do You Program the Elecfreaks Micro:bit Using Python and MakeCode?
The Elecfreaks micro:bit supports two primary programming approaches: visual block-based MakeCode and text-based Python. MakeCode suits beginners with its drag-and-drop interface and instant feedback. Python appeals to teens learning professional programming languages. Both approaches compile to the same machine code running on the micro:bit. Teens can switch between MakeCode and Python within the same project. The Python micro:bit editor provides a web-based environment requiring no installation. Understanding both approaches gives teens flexibility and deeper comprehension of programming concepts. Most educational programs recommend starting with MakeCode, then transitioning to Python for advanced projects.
MakeCode Block Programming Approach
MakeCode uses visual blocks representing programming concepts. Blocks snap together like puzzle pieces, preventing syntax errors. The interface includes a simulator showing results before uploading to hardware. Beginners see immediate visual feedback, building confidence quickly. MakeCode includes extensive documentation and tutorial videos. The block library covers all micro:bit functionality: GPIO control, sensor reading, wireless communication, and mathematics. Teens can export MakeCode projects as Python code to learn text-based syntax.
Python Text-Based Programming
Python on micro:bit uses simplified syntax suitable for embedded systems. The microbit module provides functions for all hardware control. Here’s a simple example displaying text on the LED matrix:
from microbit import display

while True:
    display.scroll('Hello Teens!')
    display.clear()
Python programs run directly on the micro:bit without external dependencies. Teens learn professional Python syntax applicable to larger projects. The text-based approach teaches careful attention to syntax and indentation. Error messages guide debugging when code fails to execute properly.
Key Takeaway: Both MakeCode and Python are valid approaches; start with MakeCode for rapid progress, then transition to Python for deeper learning.
What Practical Tips Help Teens Succeed With Elecfreaks Micro:bit Projects?
Success with the Elecfreaks micro:bit requires systematic approaches and persistence. Experienced builders develop habits ensuring reliable results. These practices prevent frustration and accelerate learning. Teens should document their work for future reference and portfolio building. Collaboration with peers strengthens problem-solving skills. Regular practice with small projects builds confidence before tackling ambitious builds. Online communities provide support when teens encounter unexpected challenges. The following tips represent best practices from educators and experienced makers.
Essential Success Strategies
- Test components individually: Verify each sensor and motor works before integrating into complex systems.
- Document everything: Take photos, write notes, and save all code versions for troubleshooting.
- Start with working examples: Modify existing projects rather than building from scratch initially.
- Use version control: Save multiple code versions to revert if changes break functionality.
- Debug systematically: Isolate problems by testing one component at a time.
- Join online communities: Participate in forums where experienced makers offer guidance.
- Build incrementally: Add features one at a time rather than attempting complete builds immediately.
- Keep a project journal: Record what worked, what failed, and lessons learned.
Troubleshooting Common Issues
Connection problems typically stem from USB cable issues or driver installation failures. Test with a different USB cable and reinstall drivers if the micro:bit doesn’t appear in the editor. Sensor readings that seem incorrect often indicate loose breadboard connections—reseat all wires firmly. Motor behavior that doesn’t match expectations usually means insufficient power; verify battery voltage meets specifications. Code that uploads but doesn’t execute might have syntax errors in Python; check indentation carefully. LED displays showing unexpected patterns often indicate incorrect pin assignments in code. When stuck, isolate the problematic component and test it independently with simple code.
Key Takeaway: Systematic testing and documentation prevent most problems and accelerate learning significantly.
How Do Elecfreaks Micro:bit Projects Compare to Other STEM Kits Available in 2026?
The Elecfreaks micro:bit occupies a unique position in the 2026 STEM landscape. Unlike the LEGO Technic NASA Mars Rover which emphasizes mechanical engineering, the micro:bit focuses on electronics and programming. Compared to the SunFounder PiCar-X Raspberry Pi 5, the micro:bit is more beginner-friendly but less powerful for advanced computing. The M5Stack CardPuter offers more processing power but higher cost and complexity. The micro:bit’s strength lies in accessibility, affordability, and extensive educational support. For teens new to electronics, the micro:bit provides gentler learning curves than professional-grade platforms. The kit integrates well with other platforms, allowing teens to combine micro:bit with Raspberry Pi or Arduino as skills develop.
Comparative Strengths
- Micro:bit advantage: Lower cost, extensive tutorials, perfect for absolute beginners.
- Raspberry Pi advantage: More processing power, suitable for advanced AI and computer vision projects.
- Arduino advantage: Larger component ecosystem, professional industry adoption.
- LEGO Technic advantage: Mechanical complexity, suitable for robotics competitions.
Key Takeaway: The micro:bit excels as an entry point; teens can graduate to more powerful platforms after mastering fundamentals.
What Resources and Communities Support Elecfreaks Micro:bit Learning in 2026?
Extensive online resources support teens learning with the Elecfreaks micro:bit. The official micro:bit foundation website provides free tutorials, lesson plans, and project documentation. YouTube channels dedicated to micro:bit projects offer video walkthroughs for visual learners. GitHub repositories contain hundreds of open-source projects with complete code and schematics. Online communities on Discord and Reddit connect teens with experienced makers willing to help. Many schools incorporate micro:bit into computer science curricula, providing classroom support. Elecfreaks maintains official documentation and customer support for kit-specific components. Robotics clubs and maker spaces often have micro:bit expertise available locally. These resources transform solo learning into collaborative experiences where teens learn from peers worldwide.
The micro:bit community actively creates new tutorials monthly, ensuring current content for 2026 learners.
Key Takeaway: Abundant free resources and supportive communities make micro:bit learning accessible and collaborative.
Can Teens Use Elecfreaks Micro:bit Projects for Academic Credit or Competitions?
Yes, Elecfreaks micro:bit projects are widely recognized in educational and competitive contexts. Many schools award computer science or engineering credit for documented micro:bit projects. Robotics competitions like FIRST Lego League accept micro:bit-based robots in appropriate divisions. Science fair judges value micro:bit projects demonstrating clear problem-solving and innovation. College admissions officers recognize micro:bit portfolios as evidence of technical capability and sustained interest in STEM. Maker fairs and local competitions frequently feature micro:bit categories. Documentation and presentation skills matter as much as technical execution when seeking academic recognition. Teens should photograph their builds, record demonstration videos, and write detailed reports explaining design decisions and challenges overcome. These materials create compelling portfolio pieces for college applications and internship opportunities.
Key Takeaway: Well-documented micro:bit projects provide tangible evidence of technical skills valued in academic and professional contexts.
How Should Teens Progress From Beginner to Advanced Elecfreaks Micro:bit Projects?
Progressive skill development follows a logical sequence building on prior knowledge. Teens should complete at least three beginner projects before attempting intermediate builds. Each project level introduces new concepts and components. Rushing to advanced projects without foundational understanding leads to frustration and abandoned builds. Recommended progression takes three to six months of regular practice. Teens should spend one to two weeks on each beginner project, allowing time for experimentation and modification. Intermediate projects warrant two to four weeks each, permitting deeper exploration. Advanced projects may span months as teens balance learning with other commitments. This measured pace develops genuine understanding rather than surface-level familiarity. Teens should review and modify previous projects periodically, reinforcing concepts and discovering new possibilities.
Recommended Learning Sequence
- Weeks 1-2: Complete LED blink and traffic light projects.
- Weeks 3-4: Build sensor projects like temperature display and light-sensitive LED.
- Weeks 5-6: Create interactive projects like button counter and message scroller.
- Weeks 7-12: Tackle intermediate projects combining multiple sensors.
- Weeks 13+: Design advanced robotics projects and pursue personal interests.
Key Takeaway: Steady progression over months builds expertise; rushing leads to frustration and abandoned projects.
What Is the Best Way to Troubleshoot Elecfreaks Micro:bit Projects When Things Go Wrong?
Systematic troubleshooting isolates problems and identifies solutions efficiently. Begin by identifying whether the issue is hardware or software related. Test individual components separately before assuming complex interactions are broken. Verify all physical connections: loose breadboard wires cause most hardware failures. Check power supply voltage with a multimeter if available. Review code for syntax errors, incorrect variable names, or logic mistakes. Use print statements (in Python) or display blocks (in MakeCode) to monitor variable values during execution. Consult official documentation and online forums when standard troubleshooting fails. Many common issues have documented solutions. Taking photos of working setups helps compare configurations when problems arise. Experienced makers often solve similar problems; searching online communities frequently yields quick answers.
Systematic Debugging Process
- Identify whether problem is hardware or software related.
- Test individual components independently with simple test code.
- Verify all physical connections are secure and correct.
- Check power supply meets component specifications.
- Review code logic and syntax carefully.
- Add debug output to monitor variable values.
- Compare current setup to working examples or photos.
- Consult online communities if problem persists.
Key Takeaway: Systematic component testing and code review solve most problems faster than random troubleshooting.
What Are the Most Popular Elecfreaks Micro:bit Projects Teens Complete in 2026?
Certain projects consistently capture teen interest and engagement. The obstacle-avoiding robot ranks as the most popular intermediate project, combining motors, sensors, and autonomous behavior. Weather stations appeal to environmentally conscious teens interested in data collection. Robotic arms fascinate students drawn to mechanical engineering and precise control. Line-following robots attract competitive teens interested in robotics competitions. Smart home projects appeal to teens interested in IoT and home automation. Game projects using the LED matrix and buttons engage creative problem-solvers. Music synthesizers combining buttons and buzzers appeal to musically inclined teens. Each popular project teaches different skills while maintaining engagement through visible, tangible results. Teens often customize popular projects, adding personal touches that deepen learning and pride in accomplishments.
Key Takeaway: Popular projects maintain motivation through visible results and real-world relevance teens can relate to.
Should Teens Combine Elecfreaks Micro:bit With Other Platforms Like Raspberry Pi or Arduino?
Yes, combining platforms extends capabilities beyond single-system limitations. The micro:bit excels at sensor input and real-time control, while Raspberry Pi handles complex computation and AI. Arduino specializes in precise analog control and industrial applications. Teens can use the micro:bit as a sensor interface feeding data to Raspberry Pi for processing. Wireless communication between multiple micro:bits enables distributed systems. This multi-platform approach teaches systems architecture and integration skills. Teens should master the micro:bit thoroughly before adding complexity from other platforms. The micro:bit’s lower learning curve makes it ideal for beginners before progressing to Raspberry Pi or Arduino. Many advanced projects benefit from this layered approach, leveraging each platform’s strengths. The M5Stack CardPuter provides another powerful option for teens ready for more sophisticated computing.
Key Takeaway: Master micro:bit fundamentals before combining platforms; multi-platform projects teach professional systems integration skills.
What Final Thoughts Help Teens Succeed With Elecfreaks Micro:bit Starter Kit Projects?
The Elecfreaks micro:bit starter kit opens doors to electronics, programming, and robotics for teens of all backgrounds. Success requires patience, systematic approaches, and persistence through inevitable challenges. Every experienced maker encountered failures; persistence distinguishes successful builders from those who quit. Documentation and community support transform frustrating problems into learning opportunities. Teens should celebrate small victories, recognizing that completing simple projects builds foundation for advanced accomplishments. The skills developed—problem-solving, logical thinking, and persistence—transfer far beyond electronics projects. Many teens discover passions for engineering, computer science, or maker culture through micro:bit exploration. The kit’s affordability means teens can experiment freely without fear of expensive mistakes. By June 2026, the micro:bit ecosystem has matured into a comprehensive platform supporting teens from absolute beginners through advanced robotics. Start small, build consistently, and let curiosity guide exploration. The possibilities are truly limitless for engaged learners willing to invest time and effort.
Key Takeaway: The micro:bit journey develops lifelong skills in problem-solving and creative thinking that extend far beyond electronics projects.
Frequently Asked Questions
What age group is the Elecfreaks micro:bit starter kit designed for?
The kit suits ages 10 and up, with optimal engagement for teens 13–18. Younger children benefit from adult guidance and simplified projects. The progressive project complexity accommodates various skill levels and learning speeds. Advanced teens find sufficient challenge in robotics and IoT applications. Teachers successfully use the kit across middle school through high school levels.
How much does the Elecfreaks micro:bit starter kit cost?
Starter kits typically range from $35–$65 USD depending on included components and retailer. Basic kits with essential sensors cost less; deluxe kits with motors and additional components cost more. Individual component purchases allow customization but often cost more than bundled kits. Regular sales and educational discounts reduce costs for schools and bulk purchases.
Can teens work on micro:bit projects without prior programming experience?
Absolutely. MakeCode’s block-based interface requires no prior coding knowledge. Teens learn programming concepts through hands-on building. The visual approach suits different learning styles. Gradually transitioning to Python deepens understanding. Tutorials guide beginners through each step systematically.
How long does it take to complete projects with the Elecfreaks micro:bit?
Beginner projects take 30 minutes to two hours. Intermediate projects require two to four hours across multiple sessions. Advanced robotics projects span weeks or months. Actual time depends on teen experience, project complexity, and troubleshooting needs. Consistent practice accelerates completion speeds.
What programming languages does the micro:bit support?
The micro:bit supports MakeCode (visual blocks), Python, JavaScript, and C++. MakeCode and Python are most popular for educational use. All languages compile to identical machine code. Teens can switch between languages within the same project. Online editors require no installation.
Are there online communities where teens can share micro:bit projects?
Yes, active communities exist on GitHub, Discord, Reddit, and official micro:bit forums. Teens share code, ask questions, and showcase builds. YouTube channels feature project tutorials and inspiration. Local maker spaces often host micro:bit clubs. These communities provide essential support and motivation.


Write Your Review
No reviews yet. Be the first to share your experience!