What Is the 3Doodler Start+ Maker Bundle and Why Do Teens Love It?
The 3Doodler Start+ Maker Bundle is a 3D printing pen system designed specifically for creative teens and young makers. This tool heats plastic filament to create three-dimensional objects in mid-air, turning imagination into tangible art. Unlike traditional 3D printers, the Start+ operates like a pen, offering immediate creative control and tactile feedback. Teens can build sculptures, jewelry, architectural models, and functional prototypes without requiring complex software or technical expertise. The bundle typically includes multiple pen colors, starter templates, and project guides to jumpstart creativity.
In June 2026, the 3Doodler Start+ remains one of the most accessible entry points for teens exploring maker culture and design thinking. The device bridges art and engineering, making it perfect for school projects, STEM activities, and personal creative expression. Many educators recommend it for developing spatial reasoning, fine motor skills, and problem-solving abilities. The bundle format provides everything needed to begin immediately, eliminating the frustration of purchasing components separately.
Key Takeaway: The 3Doodler Start+ Maker Bundle combines artistic creativity with engineering fundamentals, making it ideal for teens exploring maker projects in 2026.
What Creative Projects Can Teens Build With the 3Doodler Start+ Maker Bundle?
Teens can create an impressive range of projects using the 3Doodler Start+ system. The device excels at producing custom jewelry, decorative art pieces, functional organizers, and even architectural models. Many teens use it to design personalized phone stands, cable organizers, and desk accessories that combine aesthetics with utility. The immediate feedback from 3D pen drawing encourages experimentation and rapid prototyping of ideas.
One popular category involves creating fantasy figurines and gaming miniatures. Teens can design custom characters for tabletop games or build intricate fantasy creatures. Another engaging project type focuses on fashion accessories—custom rings, bracelets, earrings, and hair clips that reflect personal style. These projects develop understanding of three-dimensional design principles while producing wearable art.
Beginner-Friendly Project Ideas
- Simple geometric shapes and abstract sculptures to master pen control.
- Personalized name plaques and desk signs using template guides.
- Custom phone stands with ergonomic design considerations.
- Decorative plant pot holders and hanging planters.
- Simple jewelry pieces like rings and bracelet molds.
Beginners should start with structured projects using provided templates. These guide teens through layer-by-layer construction, building confidence before attempting freeform designs. Templates teach fundamental techniques like creating stable bases, controlling pen speed, and layering materials effectively.
Advanced Project Challenges
- Intricate architectural models of famous buildings or personal designs.
- Functional mechanical parts like gears and moving joints.
- Detailed fantasy creatures with fine detail work and articulation.
- Custom board game components including pieces and terrain.
- Wearable art installations combining multiple materials.
Advanced makers can tackle complex multi-part assemblies requiring precision and planning. Creating articulated figures with moving parts demands understanding of mechanical principles and spatial relationships. These projects often require sketching designs beforehand and planning construction sequences carefully.
Key Takeaway: 3Doodler Start+ projects range from simple geometric shapes to complex mechanical assemblies, accommodating all skill levels.
How Do You Master 3Doodler Start+ Techniques and Best Practices?
Mastering the 3Doodler Start+ requires understanding fundamental techniques that transform raw creativity into polished creations. Proper pen control, temperature management, and material handling directly impact project quality. The learning curve is gentle—most teens achieve decent results within their first session, then refine technique through practice and experimentation.
Temperature control is critical for consistent results. The Start+ heats filament to precise temperatures; cooler settings produce thinner lines while hotter settings create thicker, more durable structures. Teens should practice on scrap material before beginning final projects. Consistent pen speed and pressure determine line quality and structural integrity.
Essential Techniques Every Maker Should Know
- Maintaining steady pen speed for uniform line thickness and strength.
- Creating stable bases by allowing initial layers to cool completely.
- Building vertically by creating support structures and lattice patterns.
- Layering materials to increase strength in high-stress areas.
- Using templates and guides to maintain accurate proportions.
- Cooling between layers to prevent warping and deformation.
Practice builds muscle memory for consistent pen movement. Teens should warm up with simple lines and shapes before tackling complex designs. Creating test pieces helps understand how different speeds, pressures, and temperatures affect the final product. Experienced makers develop intuition about structural stability and material behavior.
Common Mistakes to Avoid
- Moving the pen too quickly, creating weak, inconsistent lines.
- Skipping cooling time between layers, causing warping and instability.
- Overloading structures without proper support frameworks.
- Neglecting to clean the pen nozzle, causing clogs and poor extrusion.
- Attempting overly complex designs without foundational skill building.
Maintenance prevents frustration and extends equipment lifespan. Regularly cleaning the pen nozzle prevents filament buildup. Storing filament in dry conditions preserves material quality. Proper care ensures the Start+ remains responsive and reliable for countless projects.
Key Takeaway: Mastering temperature control, pen speed, and layering techniques transforms 3Doodler Start+ from a fun toy into a serious creative tool.
How Does the 3Doodler Start+ Compare to Other Teen Maker Tools in 2026?
The 3Doodler Start+ occupies a unique position in the maker ecosystem. Unlike traditional 3D printers requiring computer design skills, the Start+ emphasizes immediate, hands-on creativity. Compared to laser cutters or CNC machines, it requires minimal setup and produces results instantly. The learning curve is significantly gentler than programming-based tools like Arduino robotics for beginners, making it accessible to creative teens with no technical background.
Traditional 3D printers offer higher precision and material variety but require CAD software knowledge and extended print times. The 3Doodler Start+ sacrifices some precision for immediate gratification and artistic control. For teens interested in STEM activities for high schoolers at home, the Start+ complements electronics and coding projects perfectly, providing the physical creation component.
Comparison With Other Creative Tools
- vs. Traditional 3D Printers: Start+ offers real-time control; printers require CAD knowledge and patience.
- vs. Laser Cutters: Start+ builds 3D; cutters work only with flat materials and require design software.
- vs. Craft Supplies: Start+ enables precise 3D creation; traditional crafts lack dimensional accuracy.
- vs. Coding Robots: Start+ emphasizes artistic expression; robots focus on logic and programming.
The Start+ excels at rapid prototyping and iterative design. Teens can test ideas immediately, modify designs on the fly, and learn from mistakes without waiting hours for printing. This immediate feedback loop accelerates learning and maintains engagement. For makers combining multiple tools, the 3Doodler Start+ provides the tactile, artistic component complementing digital and mechanical projects.
Key Takeaway: The 3Doodler Start+ prioritizes immediate creative control and artistic expression over precision, making it ideal for teen makers seeking instant results.
What Practical Steps Should Teens Follow to Start Their First 3Doodler Start+ Project?
Beginning a 3Doodler Start+ project requires minimal preparation but careful planning for best results. Teens should dedicate 30-45 minutes for their first project, allowing time for setup, learning, and creation without rushing. A clean, organized workspace prevents frustration and enables focus on the creative process.
Step-by-Step Getting Started Guide
- Unbox and inspect: Check all components are present, including pens, filament, templates, and instruction materials.
- Charge the device: Allow the 3Doodler to charge fully before first use, typically 1-2 hours.
- Load filament: Insert starter filament into the pen, following manufacturer instructions for proper loading.
- Practice basic strokes: Warm up by drawing simple lines and shapes on scrap material for 5-10 minutes.
- Select a beginner template: Choose a simple project from included guides, ideally a geometric shape or basic object.
- Prepare your workspace: Gather templates, reference images, and any tools you’ll need nearby.
- Build layer by layer: Follow template guides, allowing each layer to cool before adding the next.
- Cool and inspect: Allow the finished project to cool completely before handling or displaying.
Organization during the project prevents lost filament colors and template confusion. Teens should keep reference images visible and mark completed sections on templates. Taking breaks every 15-20 minutes prevents hand fatigue and maintains focus on quality.
Essential Workspace Setup
- Non-stick work surface like silicone mats or parchment paper.
- Organized filament storage preventing tangling and mixing.
- Printed or digital templates visible and accessible.
- Good lighting to see fine details clearly.
- Paper towels or cloth for quick pen nozzle cleaning.
- Small fan for accelerated cooling between layers.
A well-organized workspace dramatically improves project quality and enjoyment. Proper lighting reveals fine details and prevents mistakes. Easy access to materials maintains creative flow without frustrating interruptions. Many experienced makers keep a dedicated making station permanently set up.
Key Takeaway: Success with 3Doodler Start+ begins with proper setup, practice, and patience—teens should dedicate adequate time and organize their workspace strategically.
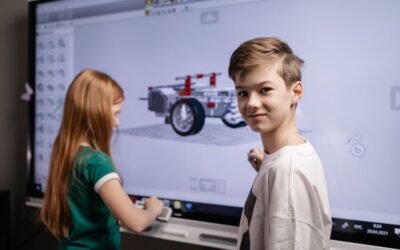
How Can Teens Combine 3Doodler Start+ With Other STEM Learning Tools?
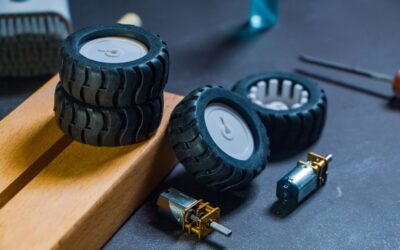
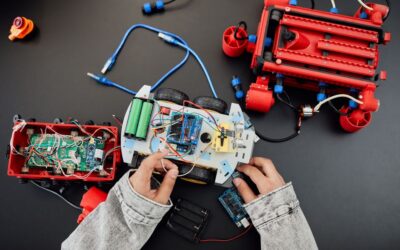
The 3Doodler Start+ integrates beautifully with broader STEM education, providing the physical creation component to complement digital and mechanical learning. Teens can design 3D-printed components for robotics projects, create custom enclosures for electronics, or prototype mechanical systems. This combination develops comprehensive maker skills spanning design, creation, and engineering.
Pairing the Start+ with coding projects creates powerful learning opportunities. Teens might design custom robot chassis with the 3Doodler, then program behavior using electronics platforms. Creating physical components for Makeblock mBot Neo advanced coding projects demonstrates how design and programming work together. This integrated approach mirrors real engineering workflows where physical design and software development proceed in parallel.
Complementary STEM Learning Paths
- Design custom parts for robotics projects, combining mechanical and coding skills.
- Create prototypes for electronics projects, testing form factors before final design.
- Build models for physics experiments, visualizing abstract concepts physically.
- Design organizational tools for lab equipment, applying design thinking to real problems.
- Prototype IoT device enclosures, bridging product design and digital connectivity.
The 3Doodler Start+ teaches design thinking—the iterative process of defining problems, prototyping solutions, and refining based on testing. This methodology applies across all STEM disciplines. Teens learn that good design requires multiple iterations, testing, and refinement. Success in maker projects builds confidence for tackling complex STEM challenges.
Key Takeaway: Integrating 3Doodler Start+ with other STEM tools creates comprehensive maker education, teaching design thinking alongside technical skills.
What Should Teens Know About 3Doodler Start+ Materials and Filament Selection?
Understanding filament options and material properties helps teens make informed decisions about their projects. The 3Doodler Start+ uses specially formulated plastic filament that heats to precise temperatures, enabling 3D extrusion. Different filament colors offer aesthetic choices, while material composition affects durability and functionality. Selecting appropriate materials for each project improves results and extends equipment lifespan.
Starter bundles typically include multiple filament colors in standard plastic formulations. These materials balance ease of use with reasonable durability for decorative and functional projects. Advanced makers may explore specialty filaments offering unique properties like flexibility, transparency, or metallic finishes. Material selection depends on project requirements and desired aesthetic outcomes.
Filament Types and Their Applications
- Standard plastic: Most versatile; ideal for sculptures, jewelry, and decorative pieces.
- Flexible filament: Creates bendable components; useful for functional items requiring movement.
- Transparent filament: Enables light transmission; perfect for decorative and artistic projects.
- Metallic finishes: Provides lustrous appearance; enhances jewelry and decorative objects.
- Glow-in-the-dark: Adds novelty appeal; creates dramatic effects in dark environments.
Proper filament storage preserves material quality and prevents degradation. Keeping filament in cool, dry conditions prevents moisture absorption that can cause extrusion problems. Organized storage prevents tangling and makes color selection quick and easy. Teens should label filament by color and type for easy identification during projects.
Key Takeaway: Selecting appropriate filament types and maintaining proper storage ensures consistent quality and expands creative possibilities with the 3Doodler Start+.
Frequently Asked Questions
What Age Is the 3Doodler Start+ Designed For?
The 3Doodler Start+ targets ages 8 and up, though teens particularly benefit from its creative potential. The device operates at lower temperatures than professional models, prioritizing safety. Teens aged 13-18 find the most engaging applications, creating sophisticated projects that challenge their design and engineering thinking. Adult supervision is recommended for younger users.
How Long Does a 3Doodler Start+ Project Typically Take?
Simple projects like geometric shapes or basic jewelry take 15-30 minutes. Intermediate projects such as detailed sculptures require 45-90 minutes. Complex multi-part assemblies may span several sessions over days or weeks. Actual creation time depends on design complexity, teen experience level, and cooling requirements between layers. Most teens complete satisfying projects in single 60-minute sessions.
Can the 3Doodler Start+ Create Functional Items or Just Decorative Pieces?
The Start+ creates both decorative and functional items. Teens successfully build phone stands, cable organizers, drawer dividers, and plant pot holders that serve practical purposes. Functional items require careful structural planning and material selection. Decorative pieces prioritize aesthetics while functional designs balance form with durability and utility requirements.
How Much Does 3Doodler Start+ Filament Cost and How Long Does It Last?
Filament costs vary by color and specialty type, typically ranging from $5-15 per pack. Standard packs contain 150-200 feet of filament, lasting through multiple projects depending on size and complexity. Bulk purchasing reduces per-unit costs. Most teens find starter bundles provide adequate filament for learning before purchasing refills for ongoing projects.
Is the 3Doodler Start+ Easy to Clean and Maintain?
Yes, maintenance is straightforward and requires minimal effort. Regular nozzle cleaning with provided tools prevents clogs. Occasional cooling fan cleaning ensures proper operation. The device requires no software updates or complex calibration. Proper storage and handling extend equipment lifespan significantly. Most maintenance tasks take just 2-3 minutes between projects.
Can Teens Design Custom Projects or Must They Use Provided Templates?
Teens can create original designs without templates once they master basic techniques. Beginners benefit from templates that teach fundamental skills. Experienced makers sketch designs beforehand, then freeform create using the 3Doodler. Many successful projects combine template guidance for structural elements with custom artistic additions, balancing structure with creativity.
How Can Teens Turn 3Doodler Start+ Skills Into Broader Making and Design Expertise?
The 3Doodler Start+ serves as a gateway to comprehensive maker education and design thinking. Teens who master this tool develop spatial reasoning, design iteration skills, and confidence in their creative abilities. These foundational skills transfer directly to more advanced tools and complex projects. Many successful makers began with 3D pens before progressing to traditional 3D printers, laser cutters, and electronics integration.
Building a portfolio of 3Doodler projects demonstrates creative capability and design thinking to colleges and potential employers. Teens can document their work through photos and videos, creating a visual record of skill development. Sharing projects on maker communities and social platforms provides feedback and inspiration. The confidence gained from completing 3Doodler projects encourages teens to tackle more ambitious STEM challenges.
Combining 3Doodler Start+ experience with other STEM tools creates powerful learning synergies. Teens might design custom robot components, prototype IoT device enclosures, or create physical models for scientific concepts. This integrated approach develops well-rounded maker skills applicable across engineering, product design, and creative industries. The tactile, immediate feedback from 3D pen creation complements the abstract thinking required for coding and electronics.
Key Takeaway: 3Doodler Start+ mastery builds foundational maker skills that scale to advanced tools and complex projects, preparing teens for careers in design and engineering.


Write Your Review
No reviews yet. Be the first to share your experience!