What Is an Orange Juice Titration Chemistry Kit Lab?
An orange juice titration chemistry kit teaches students to measure acidity using acid-base titration methods. Students pipette a standardized base solution into orange juice until a color indicator shows neutralization. This hands-on experiment demonstrates molarity, stoichiometry, and quantitative analysis in a real-world context. Titration determines the exact citric acid concentration in juice samples. The kit includes burettes, indicators, pipettes, and detailed protocols. Students develop precise laboratory technique while exploring food chemistry. This experiment connects classroom theory to everyday consumer products.
Titration labs have been chemistry education staples for decades, but modern kits in 2026 offer improved safety features and digital tracking capabilities. Many schools now use these experiments to introduce data collection and graphing software alongside traditional manual calculations. The orange juice context makes abstract acid-base concepts tangible and relatable. Students see how chemistry applies to beverages they consume daily. These kits typically cost between $40 and $150 depending on component quality and included materials.
Key Takeaway: Orange juice titration kits transform abstract acid-base chemistry into a measurable, real-world laboratory experience.
How Does the Titration Process Work in Orange Juice Labs?
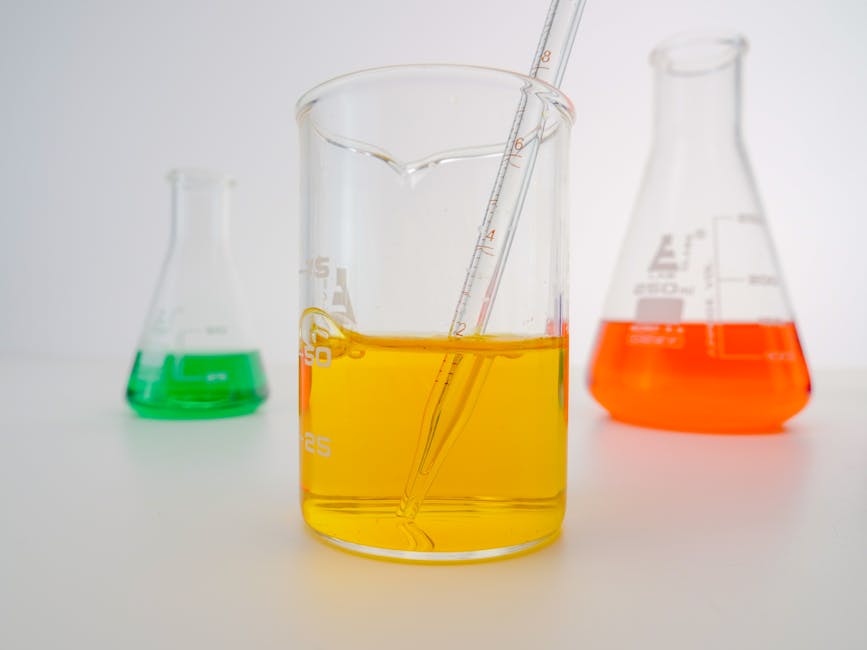
Titration measures the concentration of an unknown solution by reacting it with a solution of known concentration. In orange juice labs, the unknown is citric acid in juice, and the known is a standardized sodium hydroxide (NaOH) solution. Students slowly add NaOH from a calibrated burette into a measured juice sample. A phenolphthalein indicator changes color—from clear to pink—when the acid is completely neutralized. The volume of NaOH used reveals the exact acid concentration through stoichiometric calculations.
The chemical equation for this reaction is straightforward. Citric acid (C₆H₈O₇) reacts with sodium hydroxide in a 1:3 molar ratio. Students record the initial and final burette readings to calculate the volume of base used. Multiple trials ensure accuracy and teach the importance of reproducibility in science. The average of three consistent trials becomes the reported result.
Essential Equipment in Orange Juice Titration Kits
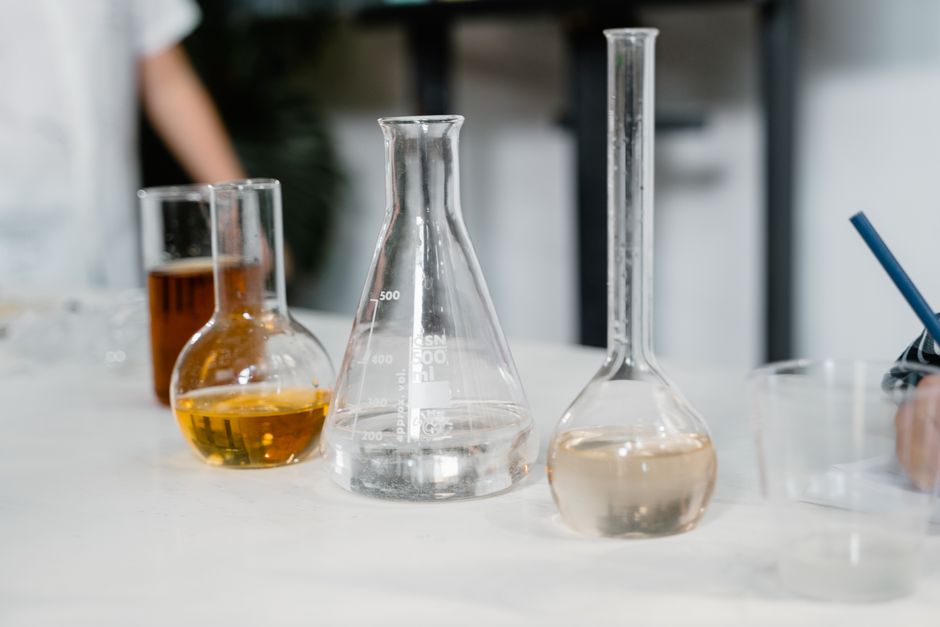
- Burette (50 mL or 25 mL graduated cylinder with stopcock valve for precise delivery).
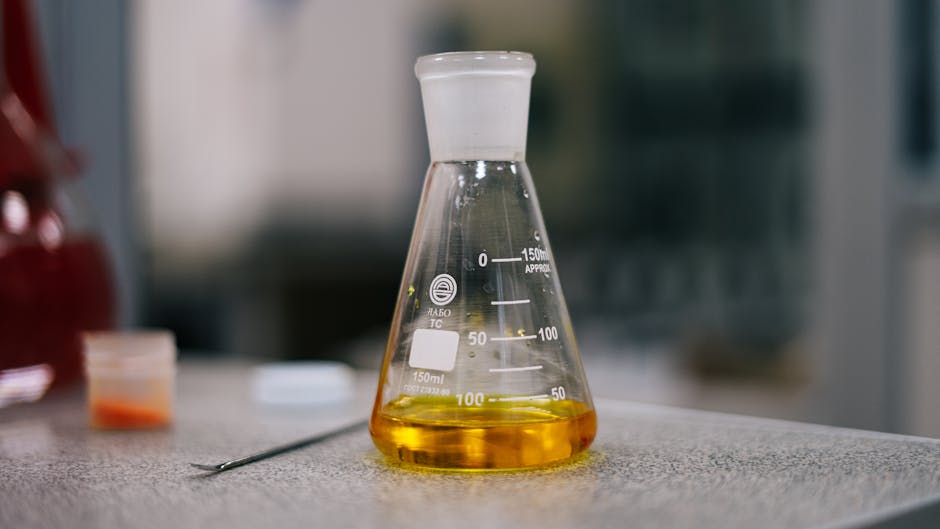
- Erlenmeyer flask (250 mL conical flask holds juice sample during titration).
- Pipette or graduated cylinder (measures exact juice volume, typically 10–20 mL).
- Standardized NaOH solution (0.1 M concentration, pre-prepared and labeled).
- Phenolphthalein indicator (color-changing agent, typically 1% solution).
- Wash bottle (rinses equipment with distilled water between trials).
- Data sheet and burette stand (supports burette vertically during the experiment).
Quality matters significantly in titration labs. Glass burettes with PTFE stopcocks resist corrosion better than plastic alternatives. Calibrated pipettes ensure sample volumes are exact. Standardized NaOH solutions must be verified for concentration to produce reliable results. Kits from established science suppliers typically include all calibrated components ready to use.
Key Takeaway: Precision equipment and standardized solutions are critical for accurate titration results.
What Educational Concepts Does Orange Juice Titration Teach?
This experiment teaches multiple chemistry concepts simultaneously. Students learn acid-base chemistry, molarity calculations, stoichiometry, and quantitative analysis. They practice laboratory safety, proper equipment handling, and data recording. The experiment reinforces the concept of equivalence points and indicator selection. Students also develop critical thinking by comparing expected versus actual results. Real-world applications become clear when students calculate how much acid their favorite juice contains.
Beyond chemistry, the lab builds scientific communication skills. Students must write clear procedures, record observations, and justify their conclusions with calculations. Data analysis teaches graphing and statistical thinking. Many 2026 kits integrate with digital platforms where students upload results for class comparison. This collaborative approach reveals natural variation in experimental results and teaches error analysis.
Key Chemistry Concepts Covered
- Acid-base neutralization reactions and the mole ratio between reactants.
- Molarity (moles per liter) and how to calculate concentration from titration data.
- Stoichiometry using balanced chemical equations to predict reaction outcomes.
- Indicator selection and color change at the equivalence point.
- Experimental error, precision, and the importance of multiple trials.
- Food chemistry and how acids contribute to taste and preservation.
The orange juice context makes these abstract concepts concrete. Students can taste the sourness and relate it to the measured citric acid concentration. They understand why different juice brands taste different—some have higher acid content. This sensory connection strengthens memory and engagement with the material. Teachers often extend the lab by having students titrate different juice types or brands, creating a mini-research project.
Key Takeaway: Orange juice titration integrates multiple chemistry concepts while maintaining real-world relevance.
How Do You Set Up and Conduct an Orange Juice Titration Lab?
Proper setup ensures accurate, reproducible results. Begin by rinsing all glassware with distilled water and allowing it to air dry. This removes contaminants that could affect results. Fill the burette with standardized NaOH solution, removing air bubbles from the tip by opening the stopcock briefly. Record the initial burette reading to the nearest 0.05 mL. Measure exactly 20 mL of orange juice into an Erlenmeyer flask using a pipette. Add 2–3 drops of phenolphthalein indicator—the juice will remain colorless because it is acidic.
Begin titration by slowly opening the burette stopcock, adding NaOH dropwise into the swirling juice. Watch for the first permanent pink color change. This is the equivalence point. Close the stopcock immediately and record the final burette reading. Subtract the initial from the final reading to find the volume of NaOH used. Repeat this procedure two more times with fresh juice samples. Calculate the average volume and use it in stoichiometric calculations to determine citric acid concentration.
Step-by-Step Titration Procedure
- Rinse burette three times with small portions of NaOH solution, discarding each rinse.
- Fill burette with standardized NaOH, remove air bubbles, record initial reading.
- Pipette 20 mL orange juice into Erlenmeyer flask, add 2–3 drops phenolphthalein.
- Place flask on white tile or paper for better color visibility during titration.
- Open burette stopcock slowly, add NaOH while swirling flask gently to mix.
- Slow down near the equivalence point; add NaOH one drop at a time.
- Stop when first permanent pink color appears; record final burette reading.
- Repeat with two additional juice samples; calculate average volume used.
Safety is paramount. Wear safety goggles and a lab coat throughout the experiment. Sodium hydroxide is caustic and can burn skin—handle it carefully and wash hands immediately after. Never pipette by mouth; use a pipette bulb or automated pipette. Work in a well-ventilated area. If NaOH spills, neutralize it with vinegar before cleaning. Report all spills to your teacher immediately. These precautions protect you and create a professional laboratory environment.
Key Takeaway: Careful setup, precise measurements, and safety protocols produce reliable titration results.
What Are Practical Tips for Successful Orange Juice Titration?
Success in titration depends on attention to detail and practice. First, master burette technique before your actual trials. Practice adding drops slowly and smoothly. The equivalence point is subtle—watch carefully for the first hint of permanent pink color. Swirling the flask continuously ensures thorough mixing and sharper color change. Some students find the color change easier to spot on a white background. Place your Erlenmeyer flask on white tile or paper to increase visibility.

Preparation prevents frustration. Pre-rinse all equipment with distilled water the night before. Ensure your NaOH solution is truly standardized by checking the label or preparing it yourself from a primary standard. Room temperature matters—cold solutions change viscosity and flow rate. Allow solutions to reach room temperature before beginning. Keep a notebook for detailed observations, not just numbers. Record whether the juice was fresh, from concentrate, or pasteurized—these factors affect acid content.
Common Mistakes to Avoid
- Starting with air bubbles in the burette tip; always remove them before recording initial reading.
- Overshooting the equivalence point by adding too much NaOH too quickly.
- Using contaminated glassware or rinsing with tap water instead of distilled water.
- Recording burette readings without proper meniscus alignment at eye level.
- Forgetting to add phenolphthalein indicator, making the endpoint invisible.
- Using expired or non-standardized NaOH solution with unknown concentration.
Practice builds confidence. Your first trial may not be perfect—that is normal. The second and third trials typically show better technique and closer agreement. If your three trials differ by more than 0.5 mL, investigate why. Did you overshoot the endpoint? Was the burette not filled properly? Troubleshooting teaches as much as successful trials. Keep detailed notes about what worked and what did not. This reflective practice develops experimental thinking that applies across all science disciplines.
Key Takeaway: Mastering burette technique, preventing common errors, and practicing deliberately ensure titration success.
How Do You Calculate Results From Orange Juice Titration Data?
Calculations transform raw data into meaningful conclusions. Begin with the balanced equation: C₆H₈O₇ + 3 NaOH → Na₃C₆H₅O₇ + 3 H₂O. This shows a 1:3 molar ratio—one citric acid molecule neutralizes three hydroxide ions. Use the volume of NaOH used (in liters) and its molarity to find moles of NaOH. Divide by three to find moles of citric acid. Divide by the juice sample volume (in liters) to calculate molarity of citric acid in the juice.
Example calculation: If 20 mL of juice required 18 mL of 0.1 M NaOH, then moles of NaOH = 0.018 L × 0.1 M = 0.0018 mol. Moles of citric acid = 0.0018 ÷ 3 = 0.0006 mol. Molarity of juice = 0.0006 mol ÷ 0.020 L = 0.03 M. Convert to grams per liter by multiplying by the molar mass of citric acid (192 g/mol): 0.03 M × 192 g/mol = 5.76 g/L. This tells you the juice contains about 5.76 grams of citric acid per liter.
Calculation Workflow
- Calculate average volume of NaOH from three trials, excluding obvious outliers.
- Convert volume from mL to liters by dividing by 1000.
- Calculate moles of NaOH: volume (L) × molarity (M).
- Use stoichiometry to find moles of citric acid: moles NaOH ÷ 3.
- Calculate molarity of juice: moles citric acid ÷ juice volume (L).
- Convert to g/L if desired: molarity × molar mass of citric acid (192 g/mol).
Compare your results to literature values. Commercial orange juice typically contains 0.3 to 0.5 percent citric acid by weight, or roughly 3–5 g/L. Fresh-squeezed juice may be higher. If your results differ significantly from expected ranges, review your procedure. Did you use the correct molarity for NaOH? Was the juice sample truly 20 mL? Were burette readings recorded accurately? These questions lead to deeper understanding of experimental error and uncertainty.
Key Takeaway: Stoichiometric calculations convert burette volumes into meaningful acid concentration measurements.
What Are the Best Orange Juice Titration Kits Available in 2026?
Quality kits from established suppliers ensure reliable results and educational value. Look for kits that include pre-standardized NaOH solutions, calibrated burettes with PTFE stopcocks, and detailed instruction manuals. Some 2026 kits integrate with digital platforms where students upload data for comparison with classmates. Others include video tutorials and virtual simulations for pre-lab preparation. Budget ranges from basic kits at $40 to comprehensive systems at $200 with multiple juice samples and extended investigations.
Popular suppliers include Carolina Biological Supply, Flinn Scientific, and Ward’s Science. These companies provide kits specifically designed for high school chemistry courses. Many include safety equipment, data sheets, and teacher guides. Check whether the kit includes enough materials for multiple trials or multiple student groups. Some schools prefer bulk kits that serve an entire class. Others choose individual kits for student take-home learning. Consider your school’s budget and storage capacity when selecting a supplier.
For related hands-on chemistry experiences, explore the Eldoncard Blood Type Test Kit for High School Lab Experiments, which teaches similar laboratory precision and data interpretation skills. Students who master titration often excel in other quantitative chemistry labs.
Key Takeaway: Reputable suppliers offer kits with standardized materials and comprehensive support for successful student learning.
Frequently Asked Questions
What is the purpose of the phenolphthalein indicator in orange juice titration?
Phenolphthalein changes color at the equivalence point when acid and base are completely neutralized. It is colorless in acidic solutions and turns pink in basic solutions. This visible change signals when to stop adding NaOH, making the endpoint precise and observable. The color change is sharp and reliable, making phenolphthalein ideal for acid-base titrations. Students can easily identify when to record their final burette reading.
How many trials should students perform in a titration lab?
Students should perform at least three trials to ensure reproducibility and calculate a reliable average. The first trial is often a practice run to develop technique. Trials two and three should agree within 0.5 mL for acceptable precision. If results vary more than this, additional trials help identify systematic errors. Three trials is the scientific standard for demonstrating reproducibility and building confidence in reported results.
Can students use fresh-squeezed orange juice instead of commercial juice?
Yes, fresh-squeezed juice works well and often contains higher acid concentrations than commercial juice. The experiment becomes more interesting when comparing different juice sources. Fresh juice may have more variable results due to natural variation between oranges. This teaches students about natural product variation. Teachers can extend the lab by having students titrate multiple juice types and discussing why results differ.
What safety precautions are essential for orange juice titration labs?
Always wear safety goggles and a lab coat. Handle sodium hydroxide carefully—it is caustic and can burn skin. Never pipette by mouth; use a pipette bulb or automated pipette. Work in a well-ventilated area. If NaOH spills on skin, rinse immediately with water and notify your teacher. Report all spills to your teacher. Wash hands thoroughly after the experiment. These precautions protect students and create a safe laboratory environment.
How does temperature affect the results of an orange juice titration?
Temperature affects solution viscosity and reaction rate but has minimal impact on the final volume of NaOH needed. Allowing solutions to reach room temperature before beginning ensures consistent flow rates and reproducible results. Cold solutions flow more slowly, potentially affecting burette technique. Warm solutions flow faster, risking overshoot past the equivalence point. Room temperature experiments produce the most reliable and reproducible data for student learning.
What is the difference between the endpoint and the equivalence point in titration?
The equivalence point is when moles of acid exactly equal moles of base chemically. The endpoint is when the indicator changes color, signaling that titration should stop. In an ideal titration, these occur simultaneously. However, the endpoint is what students observe and use to record their burette reading. The difference between endpoint and equivalence point is a source of experimental error that students learn to minimize through careful technique and proper indicator selection.
How Can Orange Juice Titration Connect to Other STEM Learning in 2026?
Orange juice titration integrates naturally with broader STEM education. Students who master acid-base chemistry can explore food preservation, pH measurement, and consumer product analysis. The quantitative skills developed transfer directly to other chemistry labs. Digital data collection platforms used in modern titration kits teach spreadsheet skills and graphing. Some schools combine titration labs with programming projects where students write code to calculate results automatically.
Cross-disciplinary connections enhance learning. Biology classes study how acids affect enzyme function and cellular processes. Physics classes explore molecular interactions and solution behavior. Engineering classes consider how to design better juice packaging to preserve acidity and flavor. Mathematics classes use titration data for statistical analysis and graphing practice. These connections show students that chemistry is not isolated but central to understanding the world. For additional STEM integration ideas, explore the Smart Student’s Guide to Smart Manufacturing in 2026, which discusses how precision measurement skills apply across industries.
Key Takeaway: Orange juice titration provides a foundation for integrated STEM learning across multiple disciplines.
What Should You Know About Preparing for an Orange Juice Titration Lab?
Pre-lab preparation determines success more than any other factor. Review the balanced chemical equation and understand the stoichiometry before arriving. Sketch the burette setup and label all parts. Watch demonstration videos if your kit provides them. Understand what the equivalence point looks like and practice recognizing color changes. Read the entire procedure twice—once for overview, once for detail. Prepare a data table with columns for trial number, initial reading, final reading, and volume used. Bring a calculator for on-the-spot calculations.
Arrive early to familiarize yourself with the equipment. Ask your teacher to demonstrate proper burette technique. Practice the stopcock motion without solution. Ensure you understand safety procedures and know where safety equipment is located. Organize your workspace before beginning—have all materials within reach. A calm, organized approach prevents mistakes and builds confidence. Students who prepare thoroughly typically complete the lab in 45–60 minutes and produce reliable results. Those who rush often need additional trials and leave frustrated.
Key Takeaway: Thorough pre-lab preparation and organized workspace setup are prerequisites for successful titration experiments.
What Is the Future of Titration Labs in High School Chemistry Education?
In 2026 and beyond, titration labs are evolving with technology while maintaining their core educational value. Automated burettes with digital readouts reduce human error in volume measurement. Smartphone apps allow students to record data and receive instant calculations. Virtual reality simulations let students practice technique before touching real chemicals. Some schools combine physical labs with augmented reality guides that overlay procedure steps directly onto the lab bench. These innovations make titration more accessible to diverse learners while preserving hands-on experience.
The fundamental skill of careful observation and precise measurement remains irreplaceable. No app can replicate the satisfaction of spotting the exact color change and knowing you have performed a measurement correctly. Modern kits preserve this experiential learning while adding tools that enhance understanding. Teachers increasingly use titration as a springboard for student-designed experiments where students formulate their own research questions about juice chemistry. This shift from cookbook labs to inquiry-based learning reflects evolving pedagogical approaches in STEM education.
Key Takeaway: Titration labs are evolving technologically while maintaining their core value of teaching precision, observation, and chemical reasoning.
Should You Choose an Orange Juice Titration Kit for Your Chemistry Class in 2026?
Orange juice titration is an excellent choice for high school chemistry courses because it teaches multiple essential concepts through a single, engaging experiment. The real-world context makes abstract ideas tangible and memorable. Students see direct applications to foods they consume, increasing relevance and motivation. The experiment develops laboratory skills that transfer across all sciences. Equipment is affordable, safe when proper precautions are followed, and widely available from reputable suppliers. Most students complete the lab successfully within a single class period, making it efficient for curriculum planning.
Consider your school’s resources and learning objectives. If you emphasize quantitative analysis and stoichiometry, titration is ideal. If you want to build laboratory skills and scientific thinking, this experiment excels. If you seek to engage students through real-world applications, orange juice provides perfect context. The experiment scales from individual students to large classes and accommodates diverse learning styles. Visual learners see the color change. Kinesthetic learners develop burette technique. Analytical learners work through stoichiometric calculations. This versatility makes orange juice titration a valuable addition to any chemistry curriculum.
Key Takeaway: Orange juice titration is a versatile, engaging, and educationally sound choice for teaching quantitative chemistry in 2026.
Conclusion: Mastering Orange Juice Titration for Chemistry Success
Orange juice titration chemistry kits provide a perfect blend of real-world relevance, hands-on learning, and rigorous scientific thinking. The experiment teaches acid-base chemistry, stoichiometry, and quantitative analysis through a context students understand and can relate to their daily lives. By carefully following procedures, maintaining precise measurements, and practicing deliberate technique, students develop skills that extend far beyond chemistry. The ability to design experiments, collect reliable data, and interpret results through calculations forms the foundation of scientific literacy.
Success in titration requires preparation, attention to detail, and willingness to learn from mistakes. Your first trials may be imperfect—that is expected and valuable. Each trial teaches you something about technique, equipment behavior, or data interpretation. The most important outcome is not achieving a specific number but understanding how you arrived at your result and what factors influenced it. This reflective approach to experimentation builds genuine scientific thinking. Whether you are a high school student completing a required lab or a curious learner exploring chemistry independently, orange juice titration offers meaningful learning that connects chemistry to the real world you inhabit every day.
Key Takeaway: Orange juice titration combines real-world relevance, hands-on learning, and rigorous chemistry to develop scientific thinking and laboratory skills essential for STEM success.


Write Your Review
No reviews yet. Be the first to share your experience!