What Is Arduino Robotics for Beginners Teens in 2026?
Quick Answer: Arduino robotics for beginners teens combines microcontroller programming with mechanical design to build interactive robots. In 2026, Arduino platforms offer affordable, beginner-friendly tools that teach coding, electronics, and engineering simultaneously. Teens learn by assembling circuits, writing simple code, and controlling motors and sensors to create functioning robots. This hands-on approach builds critical STEM skills while remaining accessible to complete newcomers. Arduino’s open-source ecosystem, extensive documentation, and supportive community make it the industry standard for teen robotics education worldwide.
Arduino robotics has become the gateway to engineering for millions of teenagers globally. The platform’s simplicity doesn’t sacrifice capability—professional engineers and hobbyists use Arduino boards in real-world applications. For teens in 2026, starting with Arduino means joining a thriving community with thousands of tutorials, project ideas, and peer support. The investment is minimal, typically under one hundred dollars for a complete starter kit. Most importantly, Arduino robotics teaches problem-solving through immediate, tangible feedback.
Key Takeaway: Arduino robotics provides teens with affordable, hands-on introduction to engineering and programming through practical robot-building projects.
What Essential Components Do You Need to Start Arduino Robotics?
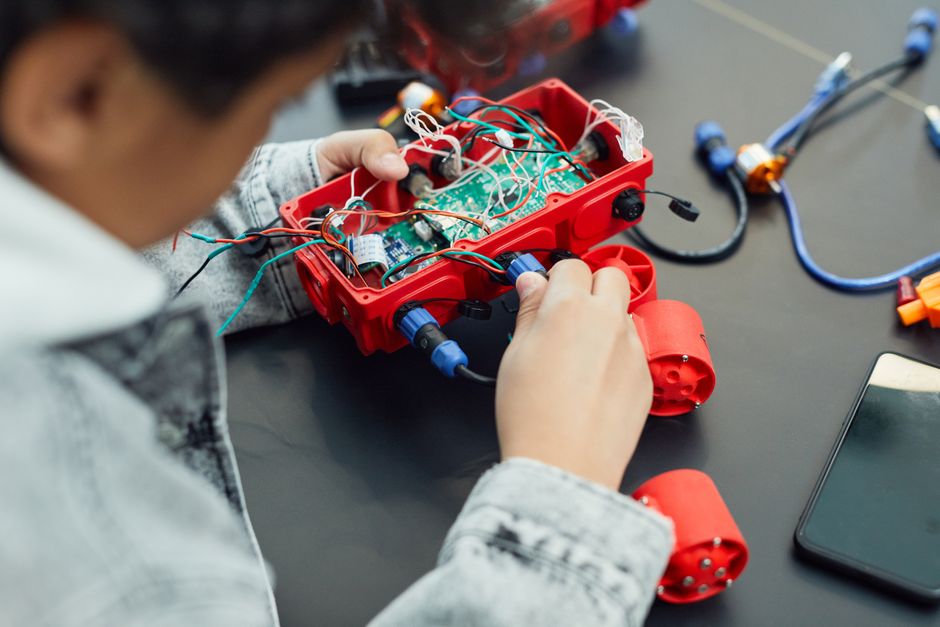
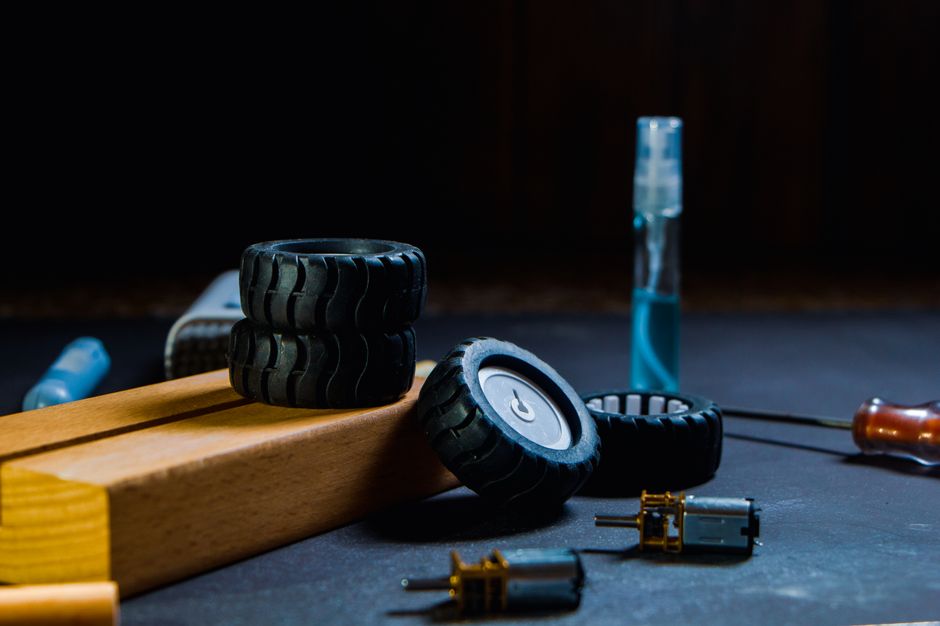
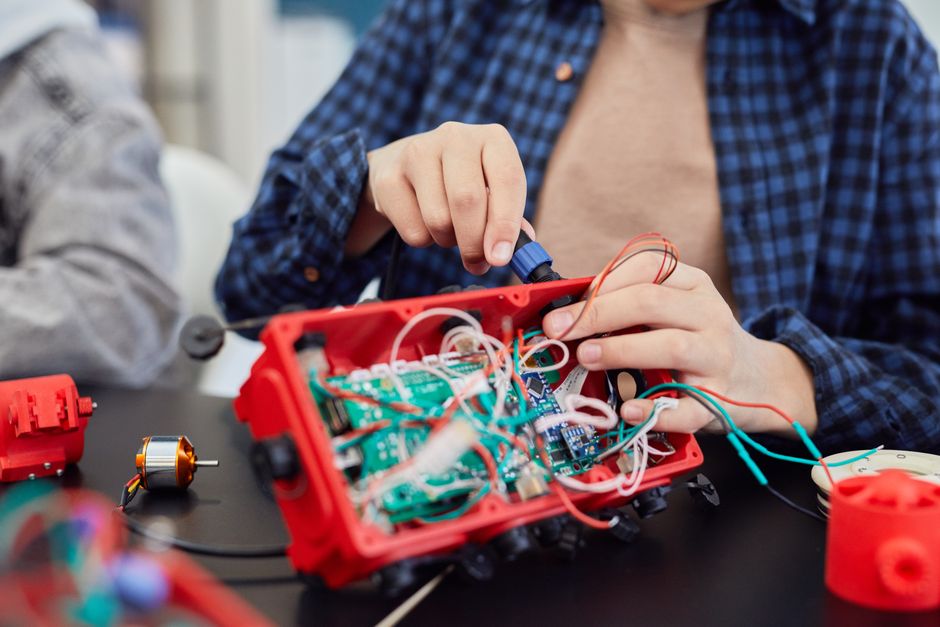
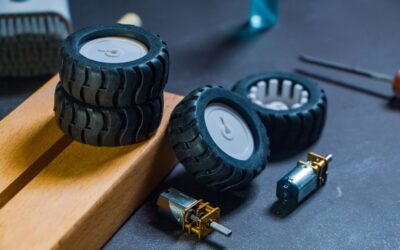
Building your first Arduino robot requires specific components working together as a system. The Arduino microcontroller board serves as the robot’s brain, processing code and controlling all other parts. You’ll need motors to create movement, sensors to gather environmental data, and a power source to energize everything. Additional components like wheels, chassis, and wiring complete the basic setup. Most beginners purchase a starter kit containing pre-selected, compatible components rather than sourcing items individually.

Core Components Every Beginner Needs
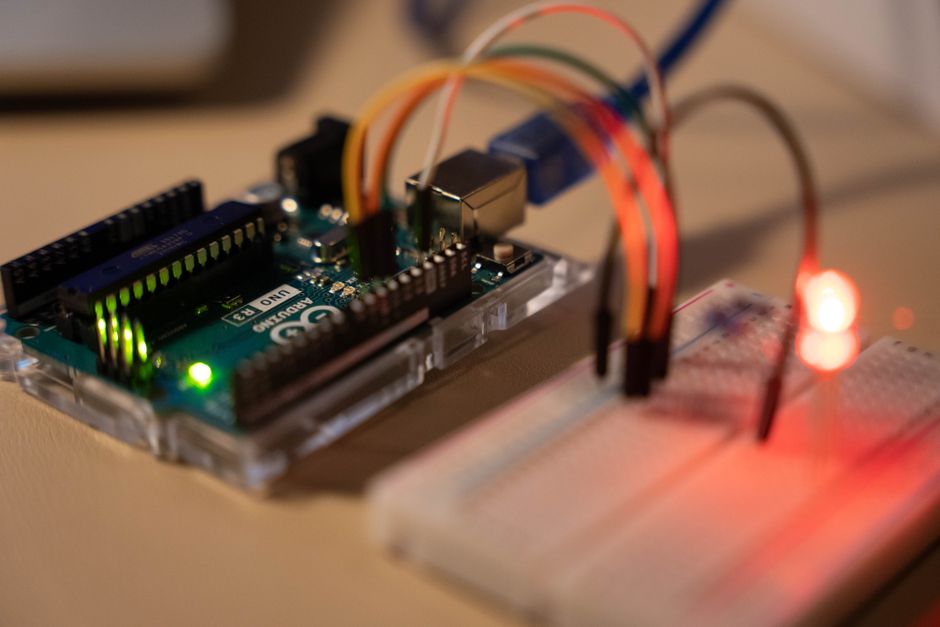
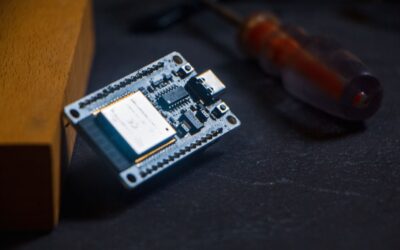
- Arduino Uno or Arduino Nano microcontroller board for processing instructions.
- DC motors with motor driver module to control speed and direction.
- Ultrasonic or infrared sensors for obstacle detection and navigation.
- Servo motors for precise movements like arm rotation or steering.
- Breadboard and jumper wires for temporary circuit connections.
- USB cable for programming and power delivery to the board.
- 9V or AA battery pack for untethered robot operation.
- Robot chassis or frame to mount all components securely.
The Arduino Uno remains the most popular choice for beginners in 2026 due to its reliability and extensive documentation. It features 14 digital input/output pins and 6 analog inputs, sufficient for most beginner projects. The board costs around twenty-five dollars, making it extremely accessible. Starter kits bundle the Uno with essential sensors and components, reducing decision-making for newcomers.
Choosing Between Arduino Board Options
Different Arduino boards suit different project needs and experience levels. The Arduino Nano offers the same functionality as the Uno in a compact size, ideal for space-constrained robots. Arduino Mega provides additional pins for more complex projects involving multiple motors and sensors. For wireless connectivity, Arduino MKR boards include WiFi or cellular capabilities. Beginners should start with Uno or Nano unless specific project requirements demand additional features.
Key Takeaway: Start with an Arduino Uno starter kit containing motors, sensors, chassis, and wiring—everything needed for your first robot project.
How Do You Learn Arduino Programming Basics for Robot Control?
Arduino programming uses a simplified version of C++ designed specifically for microcontroller beginners. The Arduino Integrated Development Environment (IDE) provides a free, user-friendly platform for writing and uploading code. Learning begins with understanding basic concepts: variables store data, functions perform actions, and loops repeat instructions. Beginners typically spend two to four weeks mastering fundamental programming before building their first robot. The learning curve is intentionally gentle, with immediate visual feedback motivating continued progress.
Essential Programming Concepts for Robot Projects
- Setup and loop functions form the basic structure of every Arduino sketch.
- Digital pins read buttons and control motors using HIGH and LOW states.
- Analog pins measure sensor values like distance or light intensity.
- Conditional statements (if/else) make robots respond to sensor input.
- Loops repeat actions like checking sensors or moving motors continuously.
- Functions organize code into reusable blocks for cleaner programming.
A simple robot program typically starts by reading a sensor, making a decision based on that input, and controlling a motor accordingly. For example, an obstacle-avoiding robot reads its ultrasonic sensor distance value. If the distance is less than twenty centimeters, the code commands the motors to reverse and turn. This three-step pattern—read, decide, act—forms the foundation of all robot behavior.
Free Resources for Learning Arduino Code
The official Arduino Getting Started Guide provides comprehensive tutorials and example sketches. YouTube channels dedicated to Arduino robotics offer visual step-by-step instruction. Online communities on Reddit and Arduino forums provide peer support when problems arise. Many schools and libraries now offer Arduino workshops specifically designed for teenagers. Starting with official tutorials ensures you learn correct practices from the beginning.
Key Takeaway: Master Arduino’s simplified C++ syntax using free official resources, then apply programming knowledge to control robot motors and sensors.
What Are the Best Beginner Arduino Robot Projects to Build in 2026?
Successful robotics learning follows a progression from simple to complex projects. Starting with basic projects builds confidence and understanding before tackling advanced challenges. Each project teaches specific skills: obstacle avoidance teaches sensor integration, line-following teaches decision logic, and robotic arms teach servo control. Most beginners complete three to five projects before attempting fully custom designs. Project-based learning keeps motivation high because results are immediately visible and tangible.
Top Beginner-Friendly Robot Projects
- Obstacle-avoiding robot using ultrasonic sensor and DC motors.
- Line-following robot using infrared sensors and motor speed control.
- Light-seeking robot programmed to move toward bright areas.
- Simple robotic arm controlled by servo motors.
- Bluetooth-controlled robot receiving commands from a smartphone.
- Sumo robot competing against other robots in a ring.
The obstacle-avoiding robot stands as the quintessential first project for Arduino beginners. It requires integrating a sensor, making a decision, and controlling two motors—covering all fundamental skills. Most teens complete this project within two to three weeks of starting Arduino. Success with this project provides the confidence boost needed to tackle more ambitious designs.
Progressing Beyond Basic Projects
After mastering basic projects, teens can combine multiple sensors and behaviors into sophisticated robots. A robot might simultaneously avoid obstacles, follow a line, and respond to light—integrating all previous skills. Adding WiFi connectivity through shields or external modules enables remote control and data logging. Some advanced beginners create robots that learn through simple machine learning algorithms. This progression keeps the hobby engaging for years.
Key Takeaway: Progress from obstacle avoidance to line-following to multi-sensor robots, building skills systematically through project-based learning.
How Do You Troubleshoot Common Arduino Robotics Problems?
Every roboticist encounters problems—motors not spinning, sensors reading incorrectly, or code not uploading. Systematic troubleshooting separates successful builders from frustrated beginners. The first step always involves checking physical connections: loose wires cause ninety percent of beginner issues. Next, verify that code uploaded successfully by checking the IDE’s status messages. Finally, test individual components in isolation before integrating them into the complete system. This methodical approach quickly identifies whether problems stem from hardware, code, or connections.
Common Issues and Quick Solutions
- Motor not spinning: Check battery voltage, verify motor driver connections, test code with digitalWrite commands.
- Sensor reading zeros: Inspect sensor wiring, verify correct pin assignment in code, test with Serial monitor output.
- Code won’t upload: Ensure correct board type selected in IDE, verify USB cable connection, try different USB port.
- Robot moves erratically: Balance motor power levels, check wheel alignment, verify sensor calibration values.
- Servo not responding: Confirm servo power supply separate from USB, check signal pin assignment, verify servo library imported.
The Arduino Serial Monitor becomes an invaluable debugging tool for beginners. By adding Serial.println() statements throughout code, you can watch variable values in real-time. This reveals whether sensors are reading correctly, whether conditions are evaluating as expected, and whether motors are receiving proper commands. Many problems that seem mysterious become obvious once you monitor actual values.
Key Takeaway: Troubleshoot systematically by checking connections first, then testing individual components, and finally using Serial Monitor to debug code logic.
What Practical Tips Help Beginners Succeed in Arduino Robotics?
Success in Arduino robotics combines technical knowledge with smart habits and mindset. Experienced builders develop practices that accelerate learning and reduce frustration. These tips come from thousands of successful teen roboticists and professional engineers who started exactly where you are. Implementing these strategies from the beginning sets you up for long-term success and enjoyment.
Essential Success Strategies for Arduino Robotics
- Start with official Arduino examples before attempting custom projects.
- Build and test circuits one component at a time, not all at once.
- Document your code with comments explaining what each section does.
- Keep a project notebook recording what worked, what failed, and why.
- Join online communities to ask questions and see others’ solutions.
- Watch multiple tutorial videos for each project to understand different approaches.
- Test sensors and motors independently before integrating into robot behavior.
- Use breadboards for development, then solder permanent connections for final versions.
Building Good Coding Habits Early
Writing clean, organized code from the beginning prevents problems later. Use meaningful variable names like distanceInCentimeters instead of d, making code self-documenting. Break complex programs into separate functions, each handling one specific task. Add comments explaining the purpose of code sections, helping your future self understand your logic. These habits, developed now, become invaluable when projects grow more complex.
Managing Time and Expectations
Expect your first robot to take four to eight weeks from purchase to completion. This timeline includes learning time, troubleshooting, and iteration. Rushing leads to frustration and mistakes that waste more time than careful progress. Set weekly milestones like “complete Arduino fundamentals course” or “get first motor spinning.” Celebrating small victories maintains motivation through the longer journey.
Key Takeaway: Develop good habits from day one: document code, test components individually, join communities, and set realistic timelines.
How Does Arduino Robotics Connect to Advanced STEM Education?
Arduino robotics serves as a bridge between casual interest and serious STEM education. Many teens who start with Arduino robotics pursue engineering degrees or technology careers. Universities recognize Arduino experience as evidence of hands-on problem-solving ability. Robotics competitions at regional and national levels use Arduino-compatible platforms, creating pathways to scholarships and recognition. The skills developed—programming, circuit design, mechanical assembly, troubleshooting—transfer directly to professional engineering work.
For teens interested in expanding beyond basic Arduino, the ESP32-S3 platform offers advanced IoT capabilities while maintaining Arduino compatibility. The ESP32-S3 adds WiFi and Bluetooth connectivity, enabling cloud-connected robots and data logging. This natural progression keeps advanced learners engaged while building toward professional-level projects. Many robotics teams transition from Arduino Uno to ESP32-S3 when their projects demand wireless capabilities.
Key Takeaway: Arduino robotics provides the foundation for advanced STEM education and can lead to robotics competitions, scholarships, and engineering careers.
Frequently Asked Questions
How much does it cost to start Arduino robotics as a beginner?
A complete Arduino robotics starter kit costs between sixty and one hundred fifty dollars. This includes the microcontroller board, motors, sensors, chassis, and wiring. Individual component purchases cost more due to shipping and minimum orders. Many schools and libraries provide free Arduino equipment, reducing personal investment. Budget increases if you want multiple robots or advanced sensors.
What age is appropriate for starting Arduino robotics?
Arduino robotics suits ages twelve and up with adult guidance, and fourteen and up for independent learning. Younger teens benefit from structured courses or school programs. Reading comprehension and basic math skills help but aren’t strict requirements. Motivation and curiosity matter more than age. Many successful Arduino roboticists started at fifteen or sixteen.
Do I need programming experience before starting Arduino robotics?
No prior programming experience is necessary. Arduino’s simplified syntax and visual feedback make it ideal for beginners. Most teens learn programming and robotics simultaneously through project-based learning. If you have previous coding experience, you’ll progress faster but won’t have significant advantages. Curiosity and persistence matter more than existing skills.
How long does it take to build your first robot?
Most beginners complete their first functional robot in four to eight weeks. This timeline includes learning Arduino basics, understanding circuits, and troubleshooting initial problems. Time varies based on prior experience, available study time, and project complexity. Some motivated teens finish in three weeks, while others take twelve weeks. Consistent weekly practice accelerates progress more than occasional intensive sessions.
Can Arduino robots compete in competitions?
Yes, many robotics competitions use Arduino-compatible platforms. FIRST Robotics, VEX Robotics, and local maker fairs welcome Arduino-based designs. Competitions provide motivation, peer learning, and recognition. Starting with simple Arduino projects builds skills needed for competition robots. Competition experience looks excellent on college applications and resumes.
What’s the difference between Arduino and other robotics platforms?
Arduino offers the best combination of affordability, simplicity, and community support for beginners. Platforms like LEGO Mindstorms cost more but provide pre-built components. Python-based platforms suit older teens but lack Arduino’s hardware integration. Arduino balances learning curve with capability, making it ideal for ages twelve to eighteen.
How Should You Get Started With Arduino Robotics Today?
Beginning your Arduino robotics journey requires purchasing equipment, learning fundamentals, and building your first project. Start by selecting a beginner-friendly starter kit containing an Arduino Uno, motors, sensors, and chassis. Download the free Arduino IDE and work through official tutorials covering basic programming concepts. Spend your first week learning to blink an LED and control a motor independently. This foundation prepares you for integrating multiple components into functional robots.
Join online communities immediately—Arduino forums, Reddit’s r/robotics, and local maker spaces provide invaluable support. Watch YouTube tutorials from established Arduino educators to supplement official documentation. Don’t hesitate to ask questions; experienced roboticists remember their own struggles and enjoy helping beginners. The Arduino community is notably welcoming and patient with newcomers.
Your first robot doesn’t need to be original or impressive—obstacle avoidance robots built by millions of teens worldwide remain perfect first projects. Focus on understanding how components work together rather than creating something unique. Success breeds motivation, which drives continued learning. After completing your first project, you’ll have the confidence and skills to tackle increasingly ambitious designs. Arduino robotics in 2026 offers more resources, better documentation, and a larger community than ever before—making this the perfect time to start.
Key Takeaway: Purchase a starter kit, learn Arduino basics through official tutorials, build an obstacle-avoiding robot, and join online communities for support and inspiration.


Write Your Review
No reviews yet. Be the first to share your experience!